Adding Paypal as a Payment Option
March 21, 2024 - Announcement
We're happy to announce that our Paypal payments integration is currently being beta tested by a few Xperiencify users.
If you'd like to join be a beta tester, please kindly drop an email to murray@xperiencify.com.
Please follow the below steps to set up Paypal as a payment option in Xperiencify.
First, let's get your Paypal account set up correctly
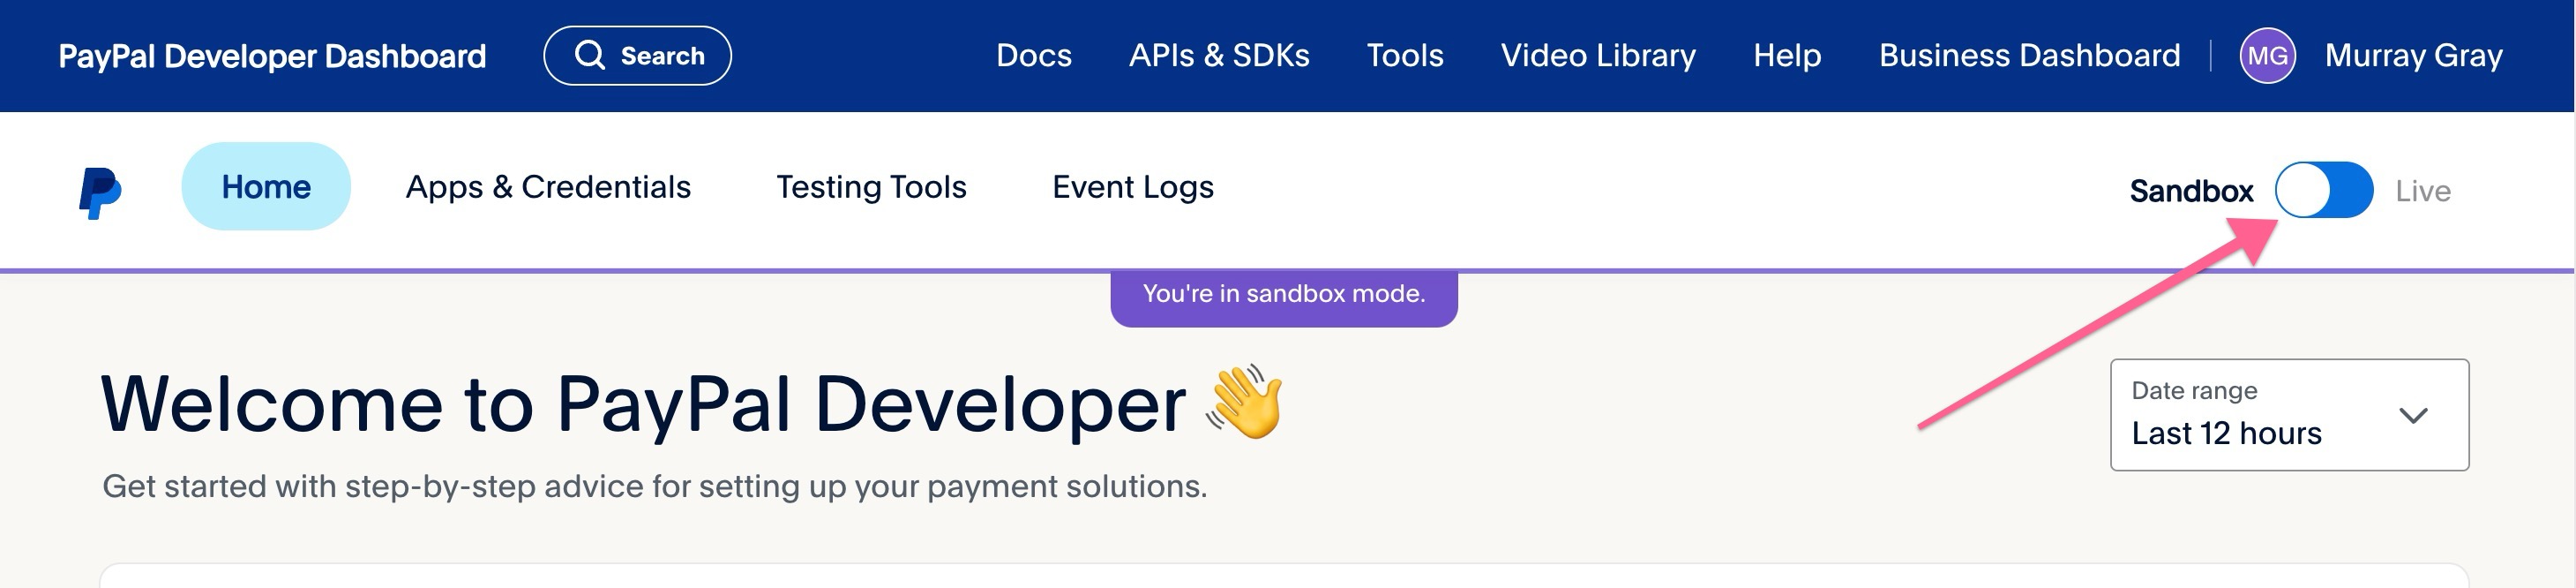
First, navigate to the Paypal Developer page in your paypal account.
Once there, you'll need to click the "Sandbox" toggle so it's set to "Live":
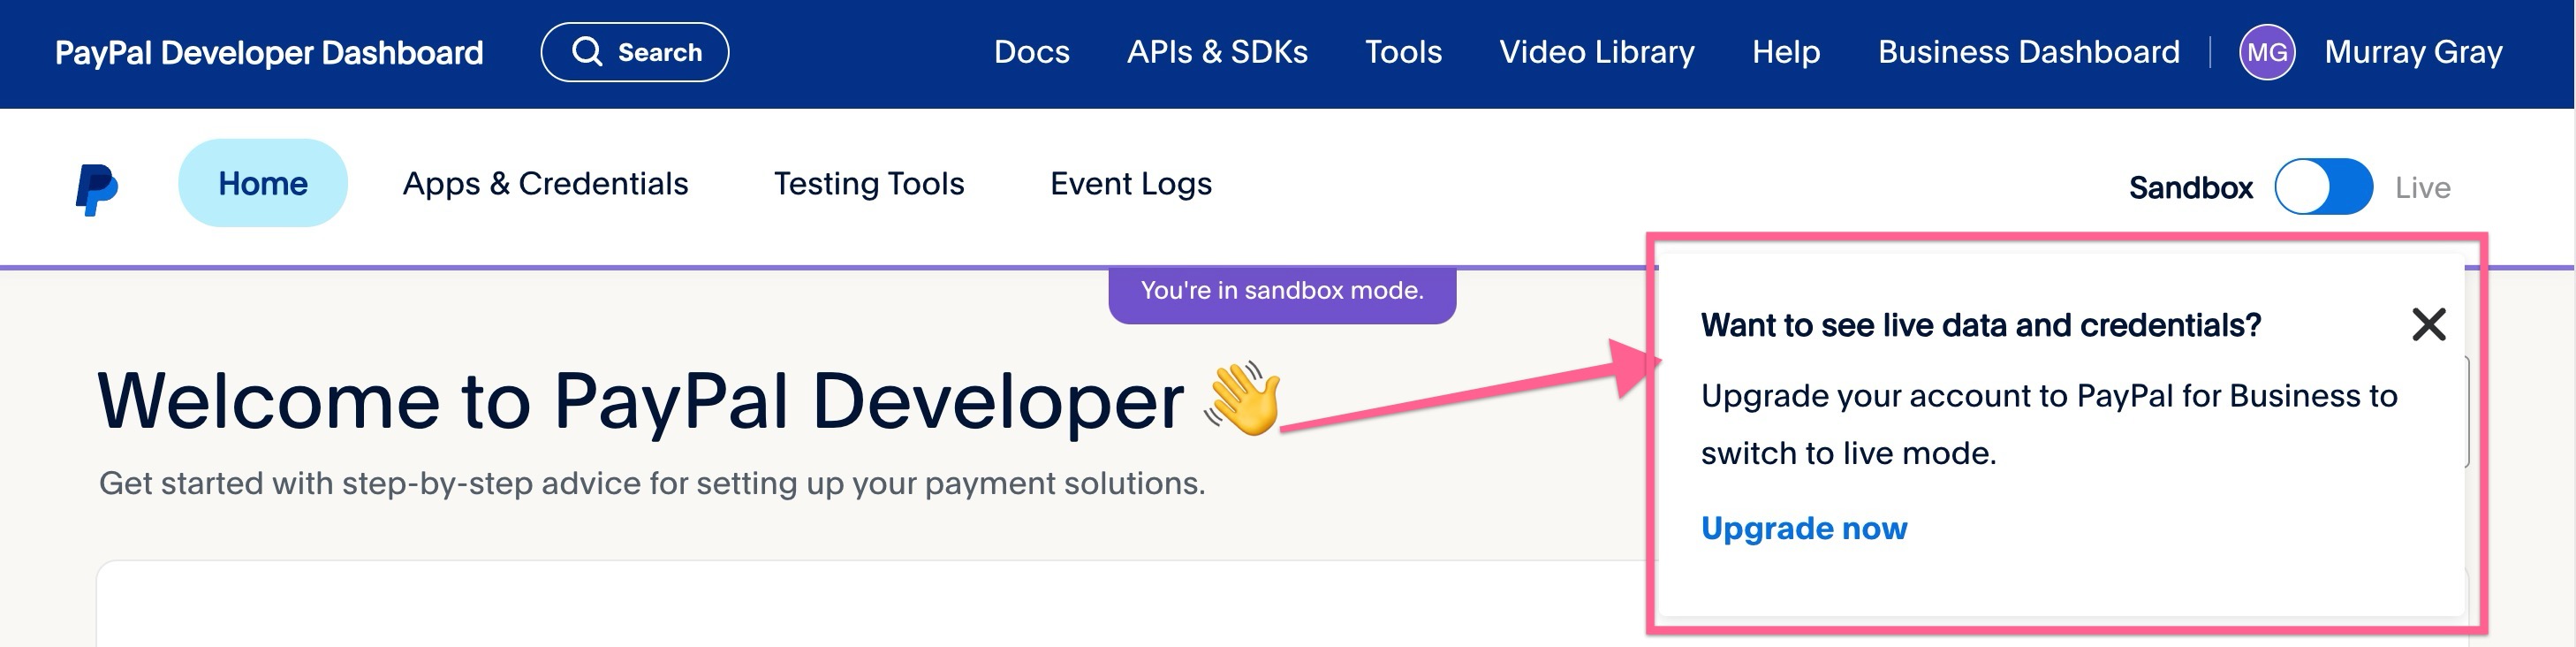
IMPORTANT NOTE: If you don't yet have a Paypay Business account, you'll see this message asking you to switch your account to a business account. This is required if you want accept payments into your Paypal account.
Once you've switched to "Live" mode, go to the API Credentials page. Once you're there, click on the Create App
button.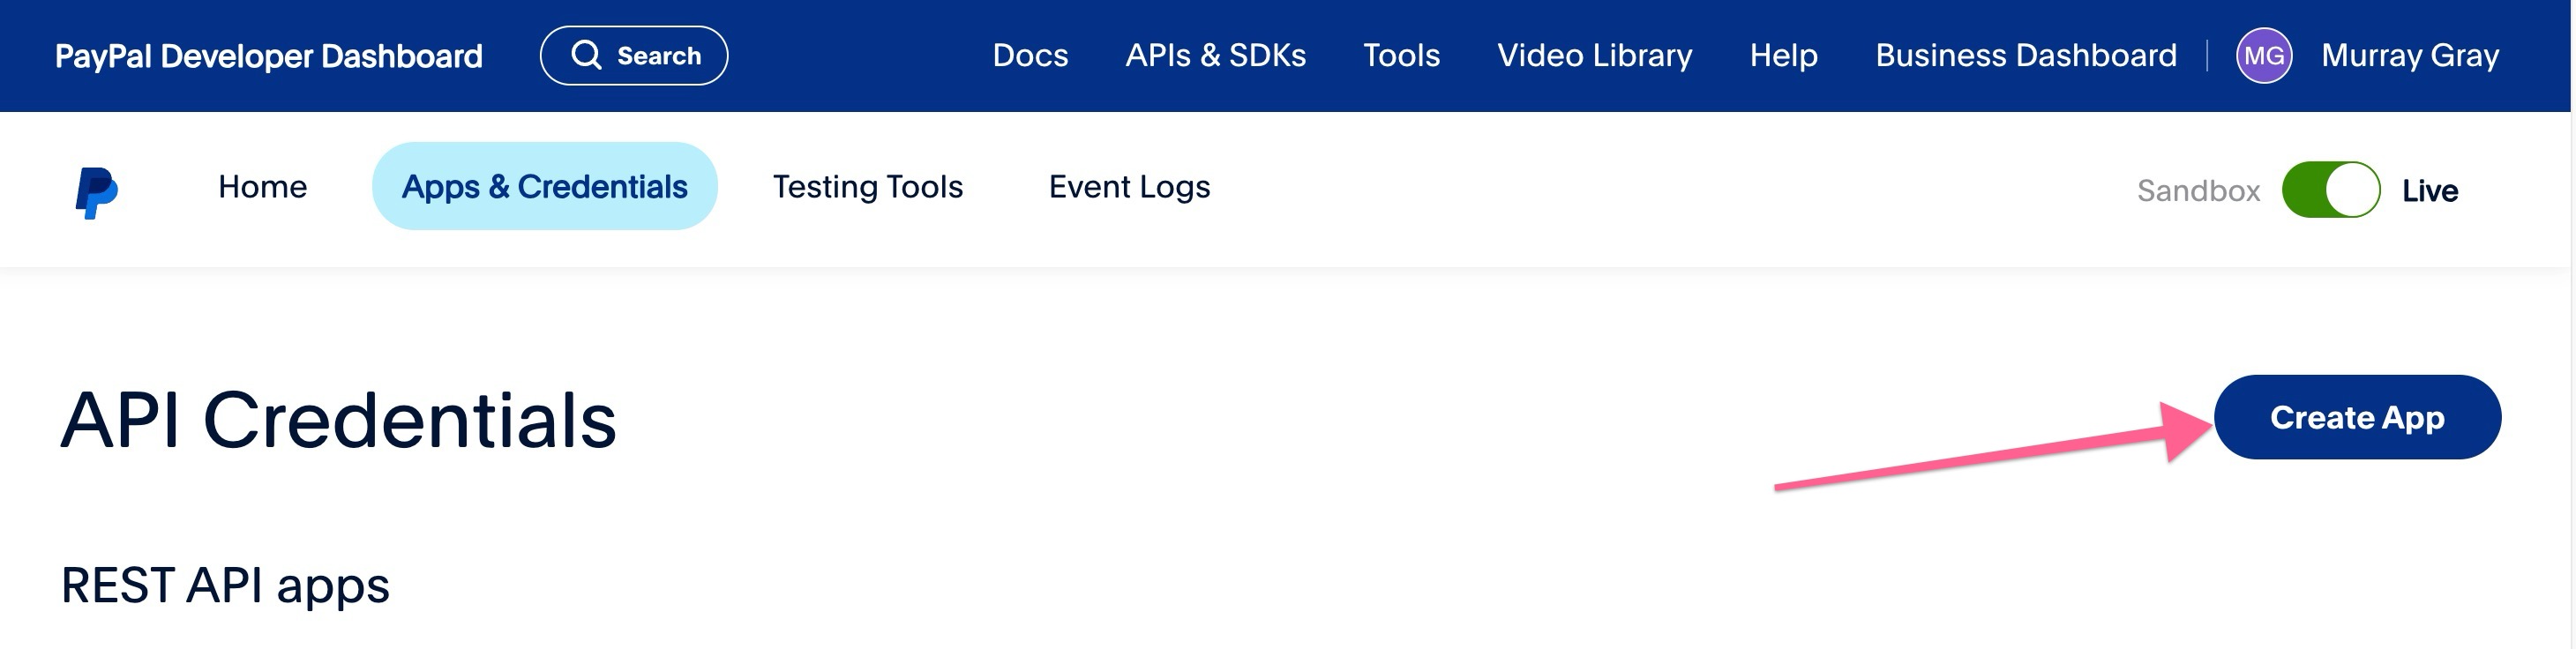
A modal will popup to ask you for an "App Name", you can enter "Xperiencify" and then click the Create App
button.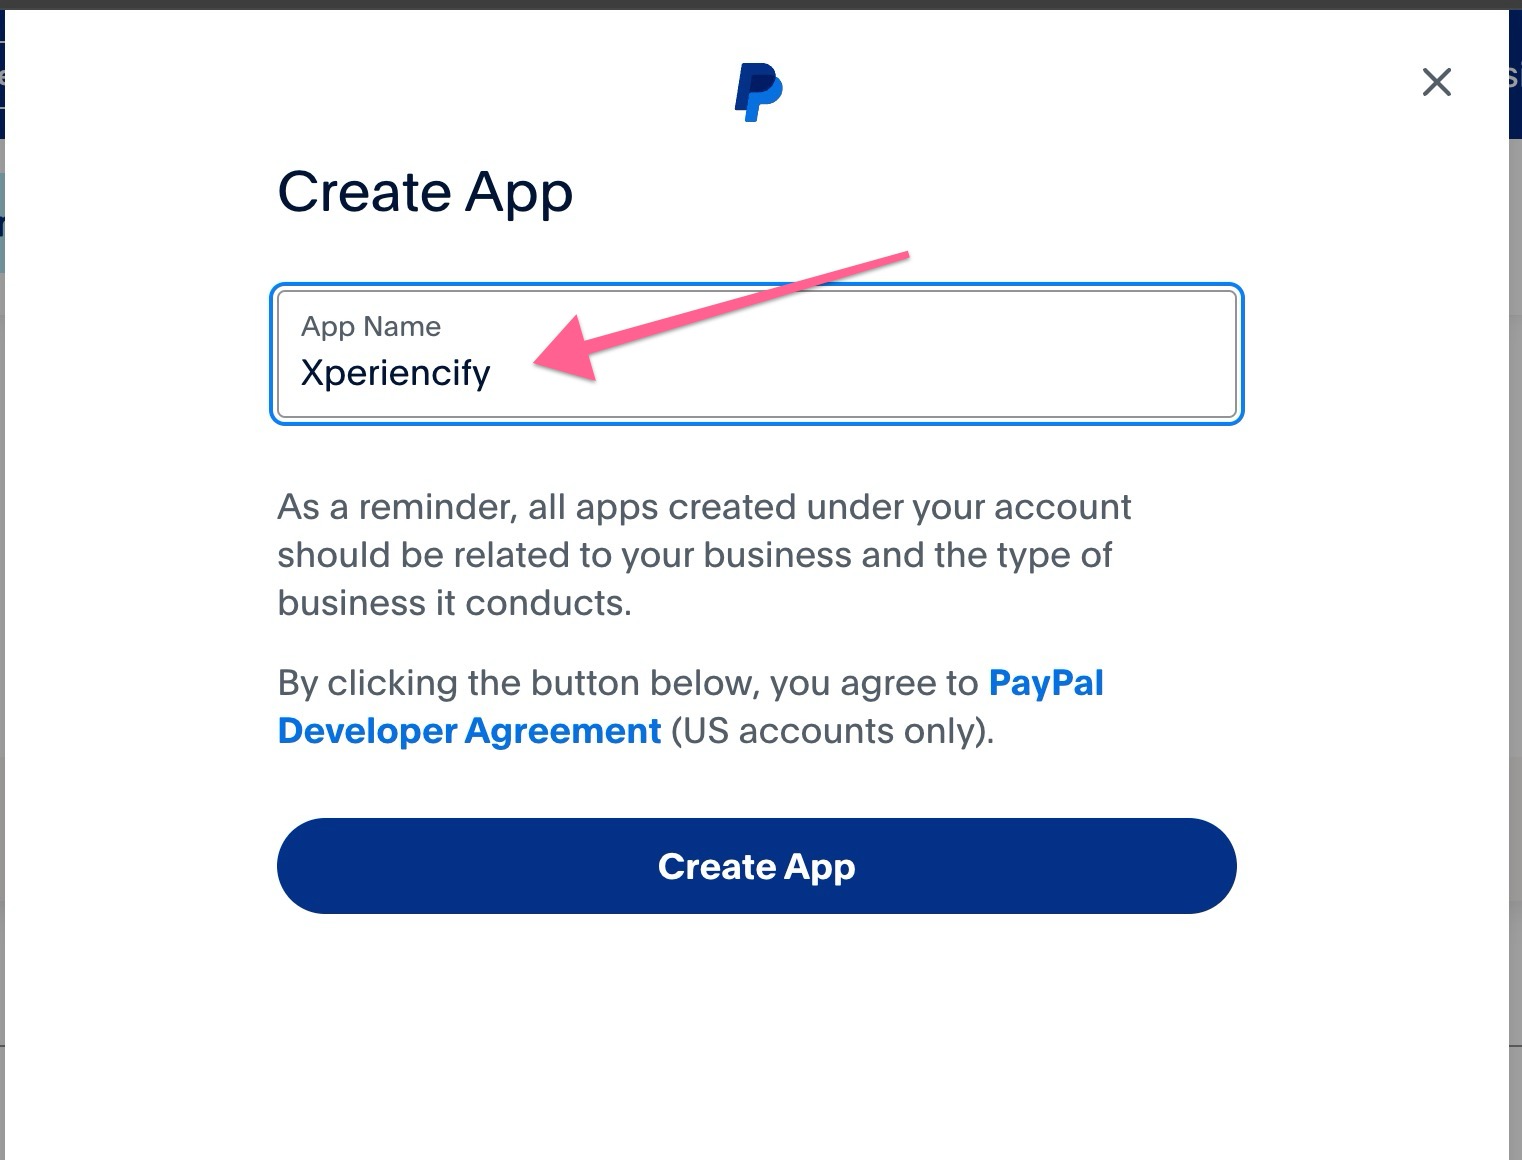
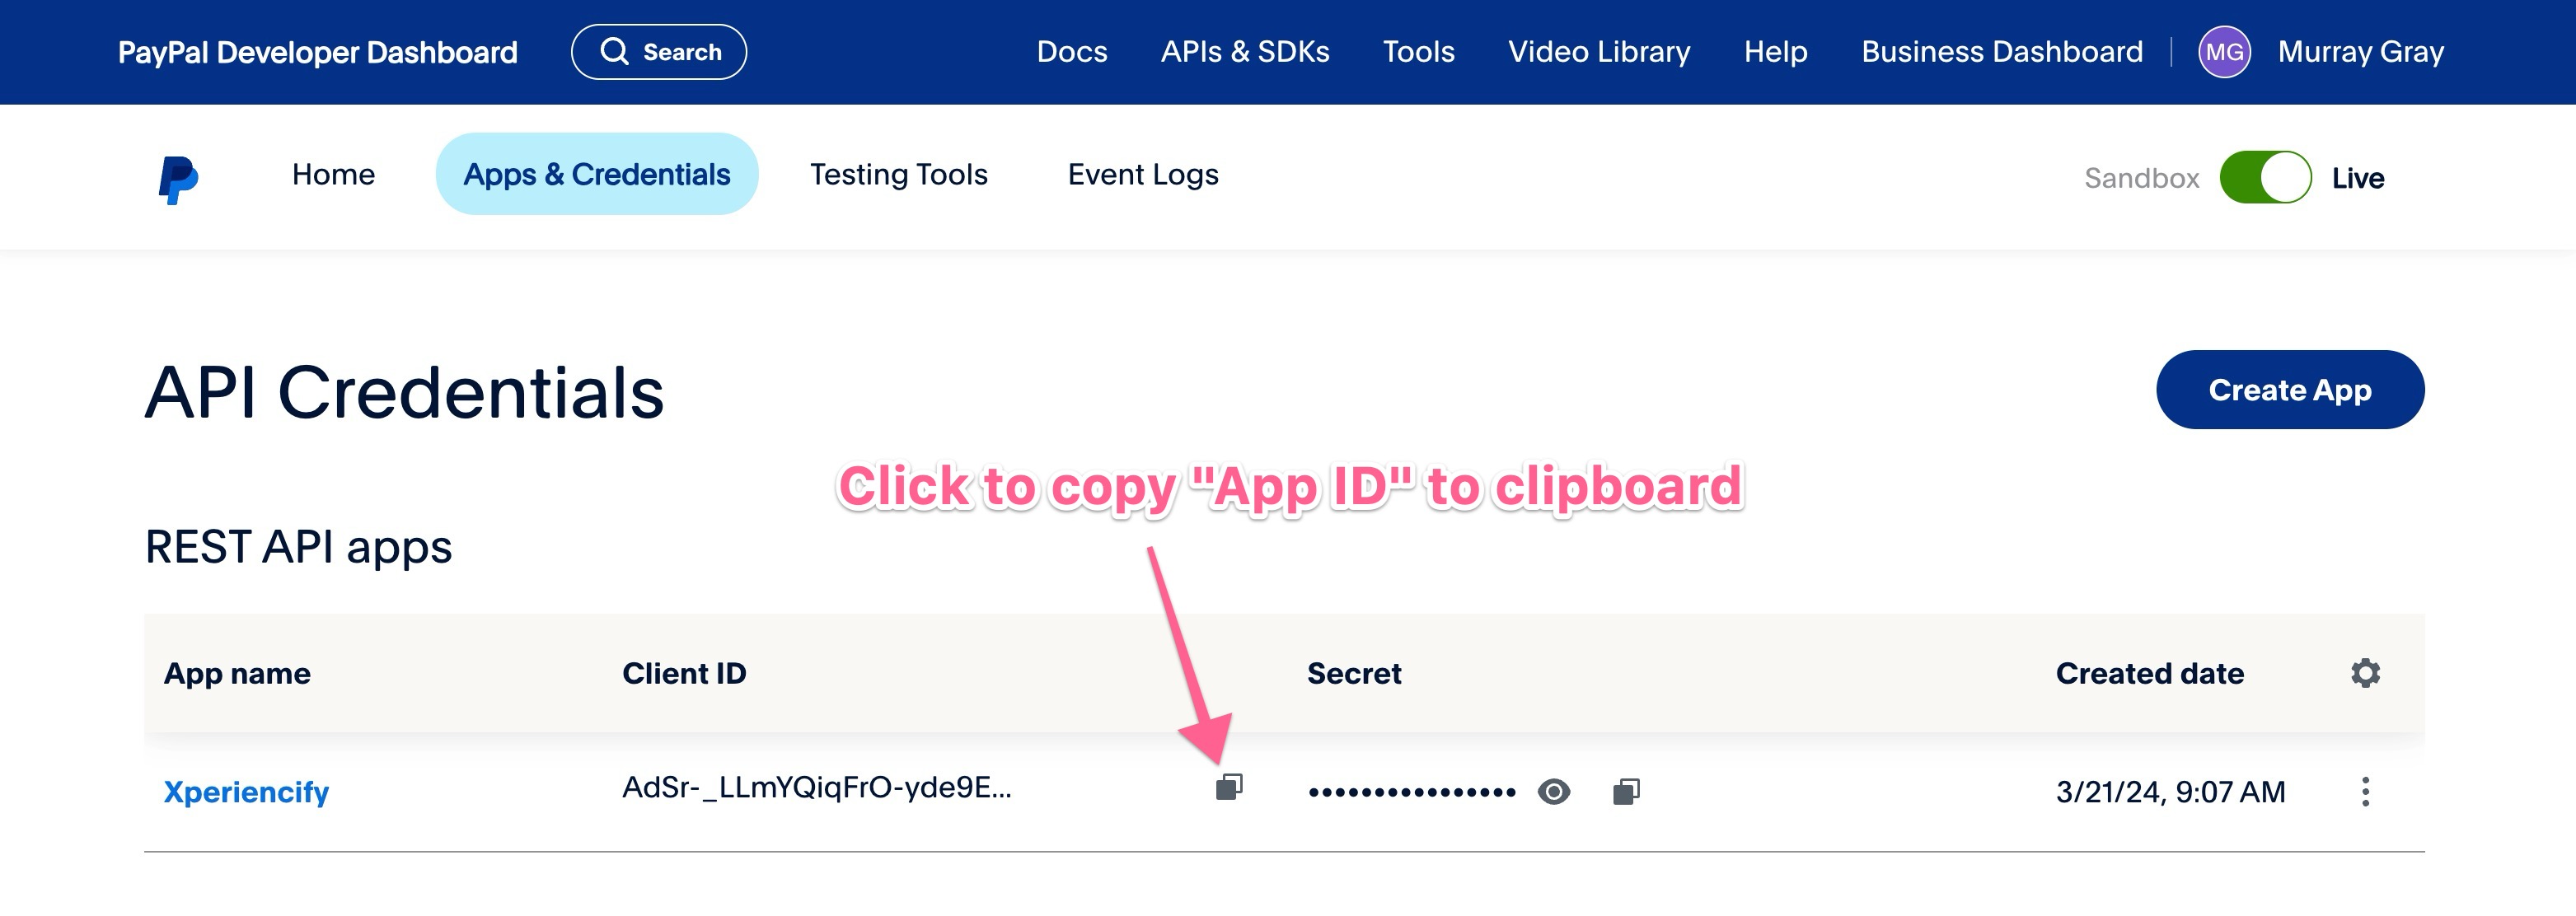
Once your new API key is created, you'll see a summary page showing the new key. Click this button to copy the "App ID" to your clipboard. Once done, add it to a text file for later use.
Next , click on this button to copy the "Secret Key" to your clipboard, and add it to a text file for later use.

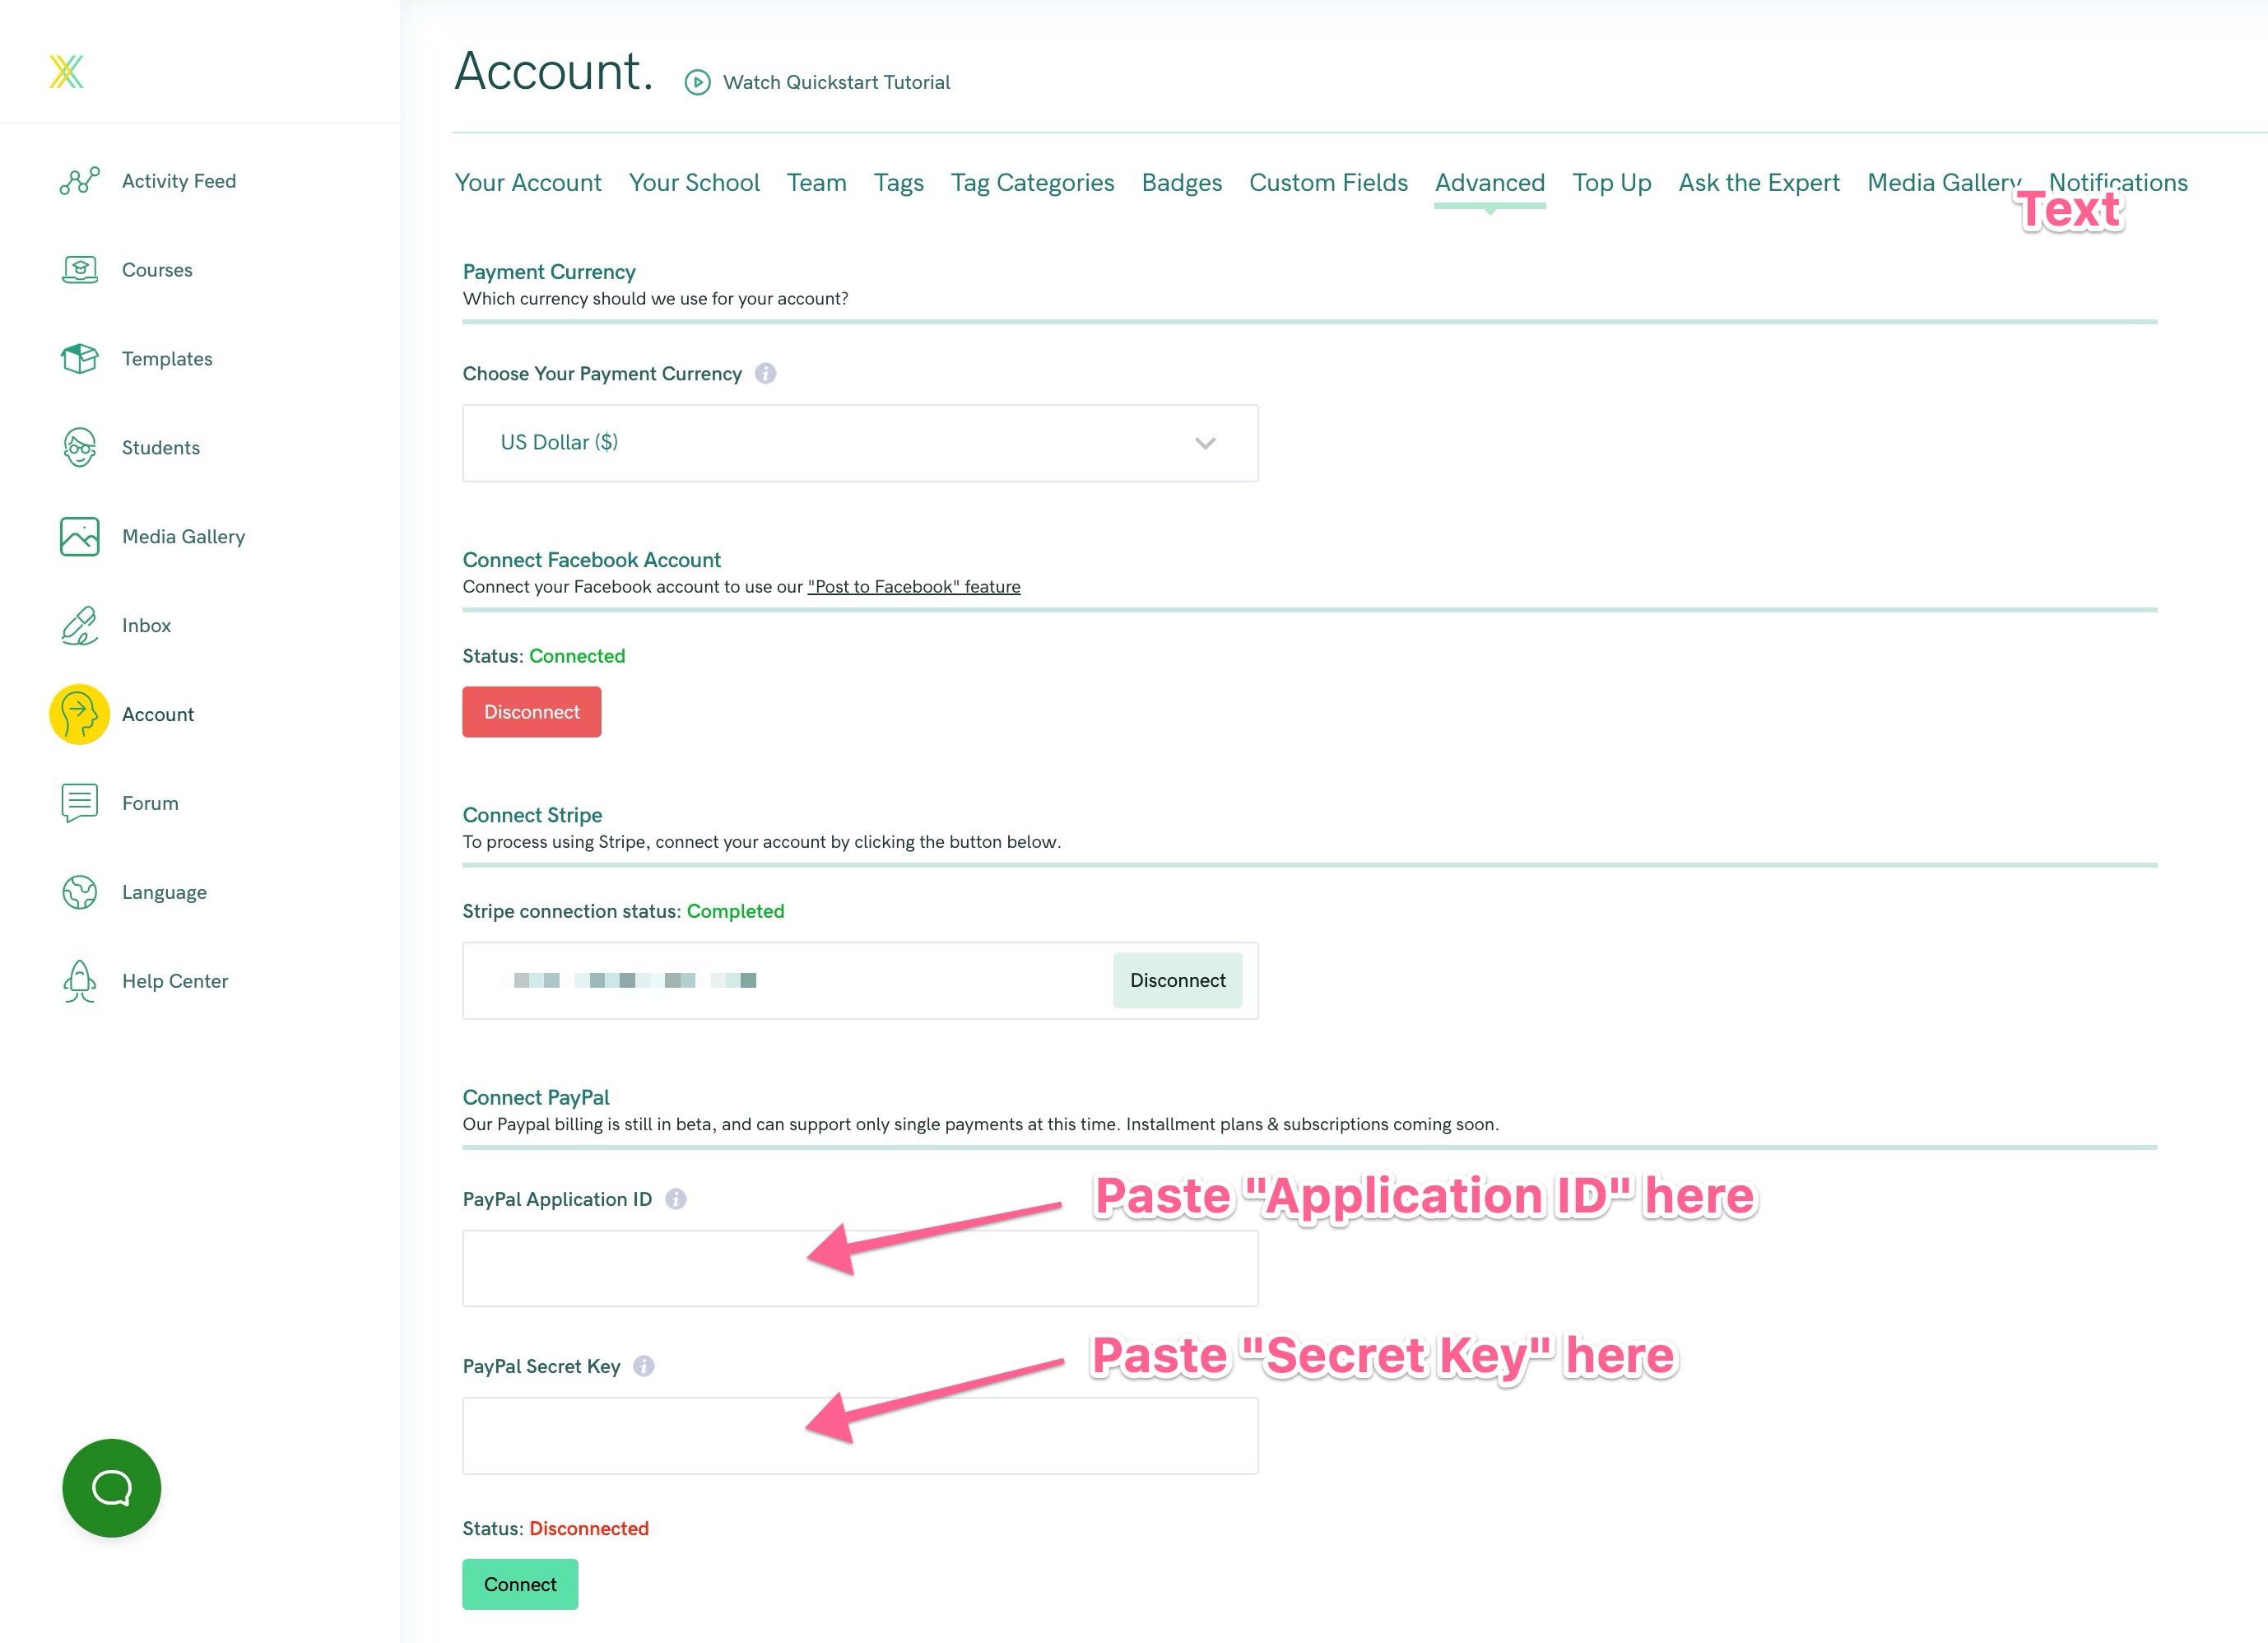
Completing the setup at Xperiencify
Now that you have your "App ID" and "Secret Key" in a text file or document, head back over the Advanced page in your Xperiencify account area. Paste those values into these two fields, and then click the Connect button to activate the connection with Paypal.