How to Turn On the Page Builder in Your Account
The Page Builder is now available!
In this article I'm going to show you how to access it right away... PLUS how you can get my personal help to upgrade to Page Builder and supercharge your course.
But, first, what is the Page Builder?
It's an incredibly quick & simple way to customize your course pages (plus build CUSTOM pages too!)
- Don't want this block on that page? Just delete it...
- Want to move this bit above that other bit? Done..
- Want to add some text in that particular spot? Go for it...
- Want to throw a button there? Cool beans...
- Want to customize your course pages with student info (such as their first name)? Sweet.
- Want to show some content only to some students? Easy!
To give you a better idea of what I'm talking about, I recorded you a quick video to show you what you can do with it here.
If you'd like to try it out, here's how:
1. Head over to your Account page, click on "Beta Page Builder" tab and click the big green button indicated here: 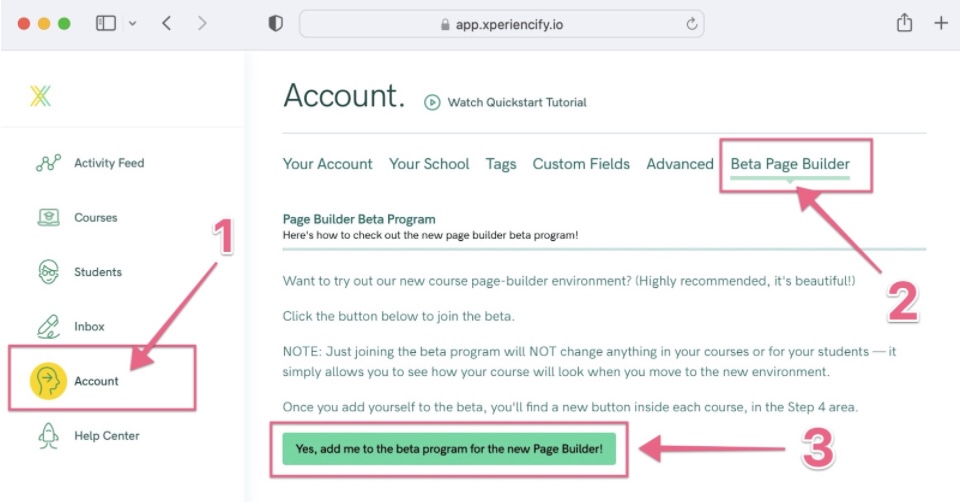
Clicking this button is going to enable the Page Builder for your account. (Note that nothing will change for your students until you want it to!)
2. Once you've turned the Page Builder on, then you can see what your pages look like by editing an existing course, and then clicking here: 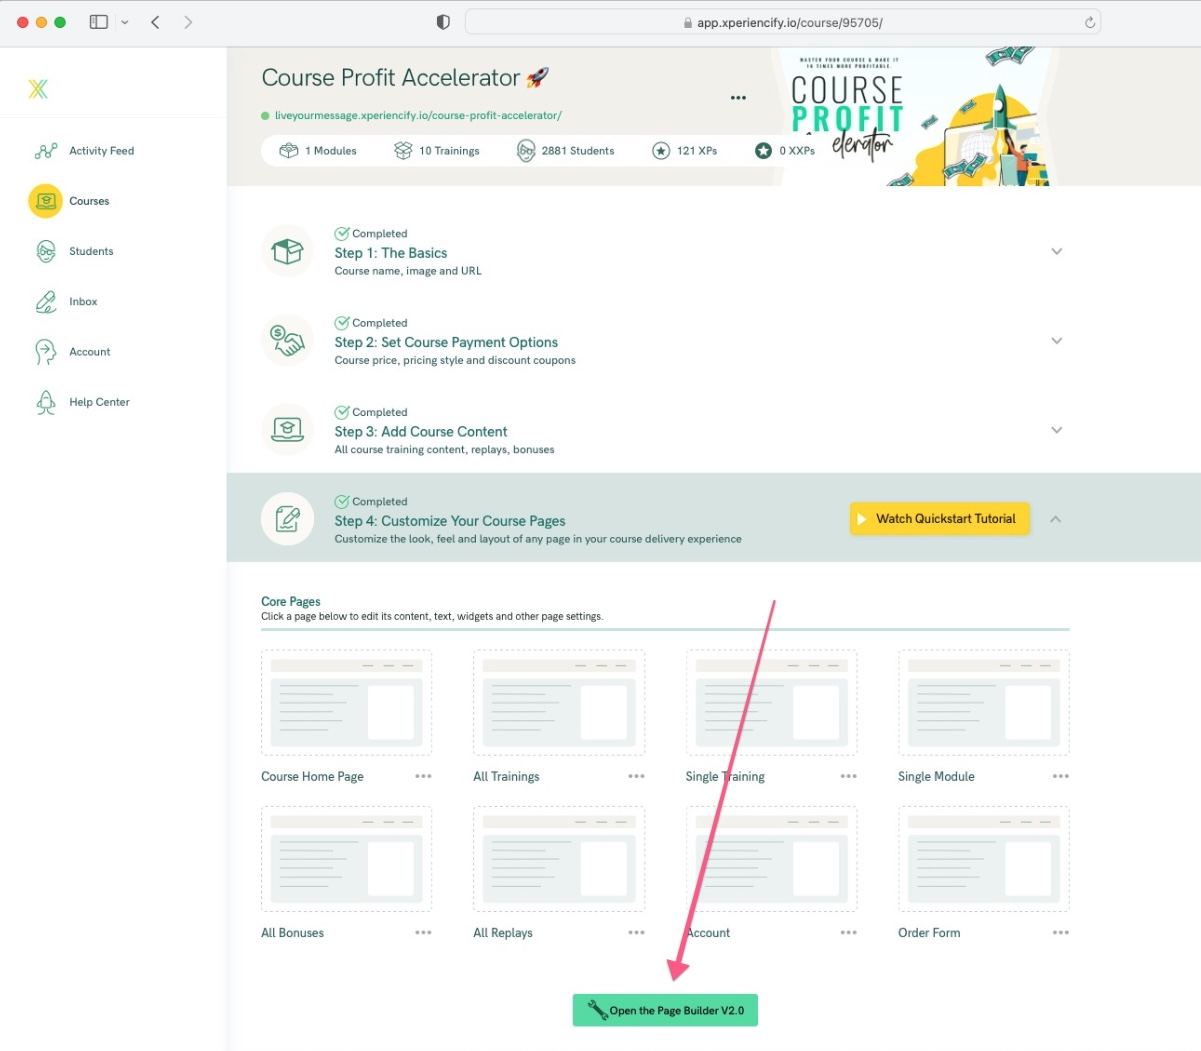
3. When you're ready to upgrade your course experience for your students, just come back to the same page as above and click this button to do that. 
When you click that button, your account will be switched to use the Page Builder, and your students will see your new pages too. Make sure you're 100% ready to go before you click the button though, because you can't switch your account back once you've clicked.