Customizing Your Login Page
How to Customize Your Login Page
You can customize your students' login page, to reflect your branding - here's how.
Inside Step 4 of your Course Builder, on the left-hand sidebar, find "Global Pages" and click on the "Login" page to open it. 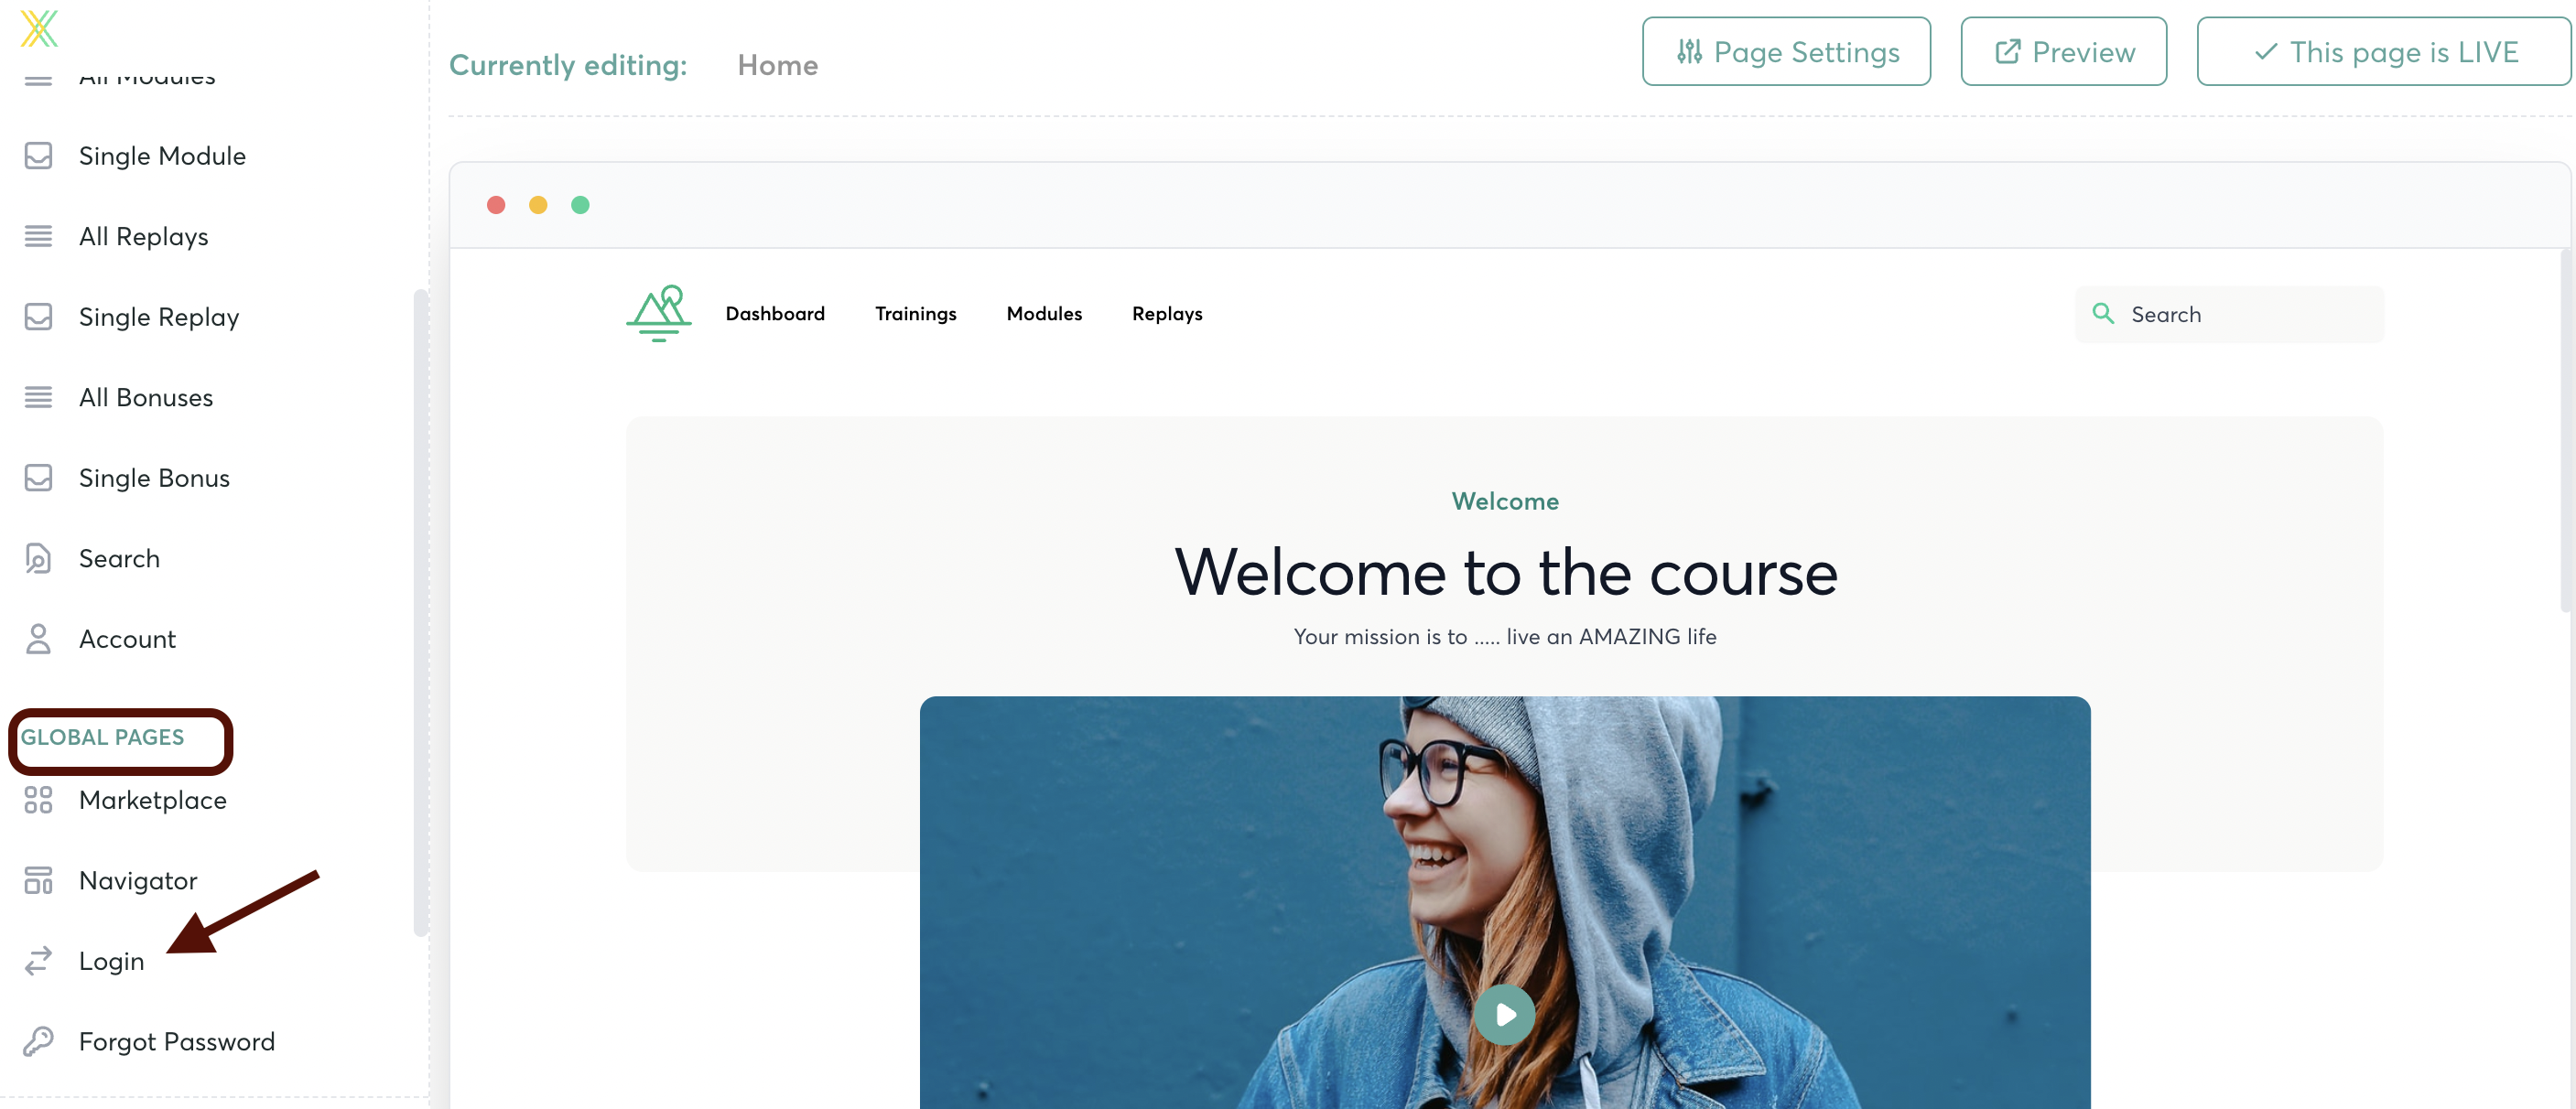
From the left-hand sidebar, select the "Login" block. Click to select it, and drag it to the right to drop it onto your page.

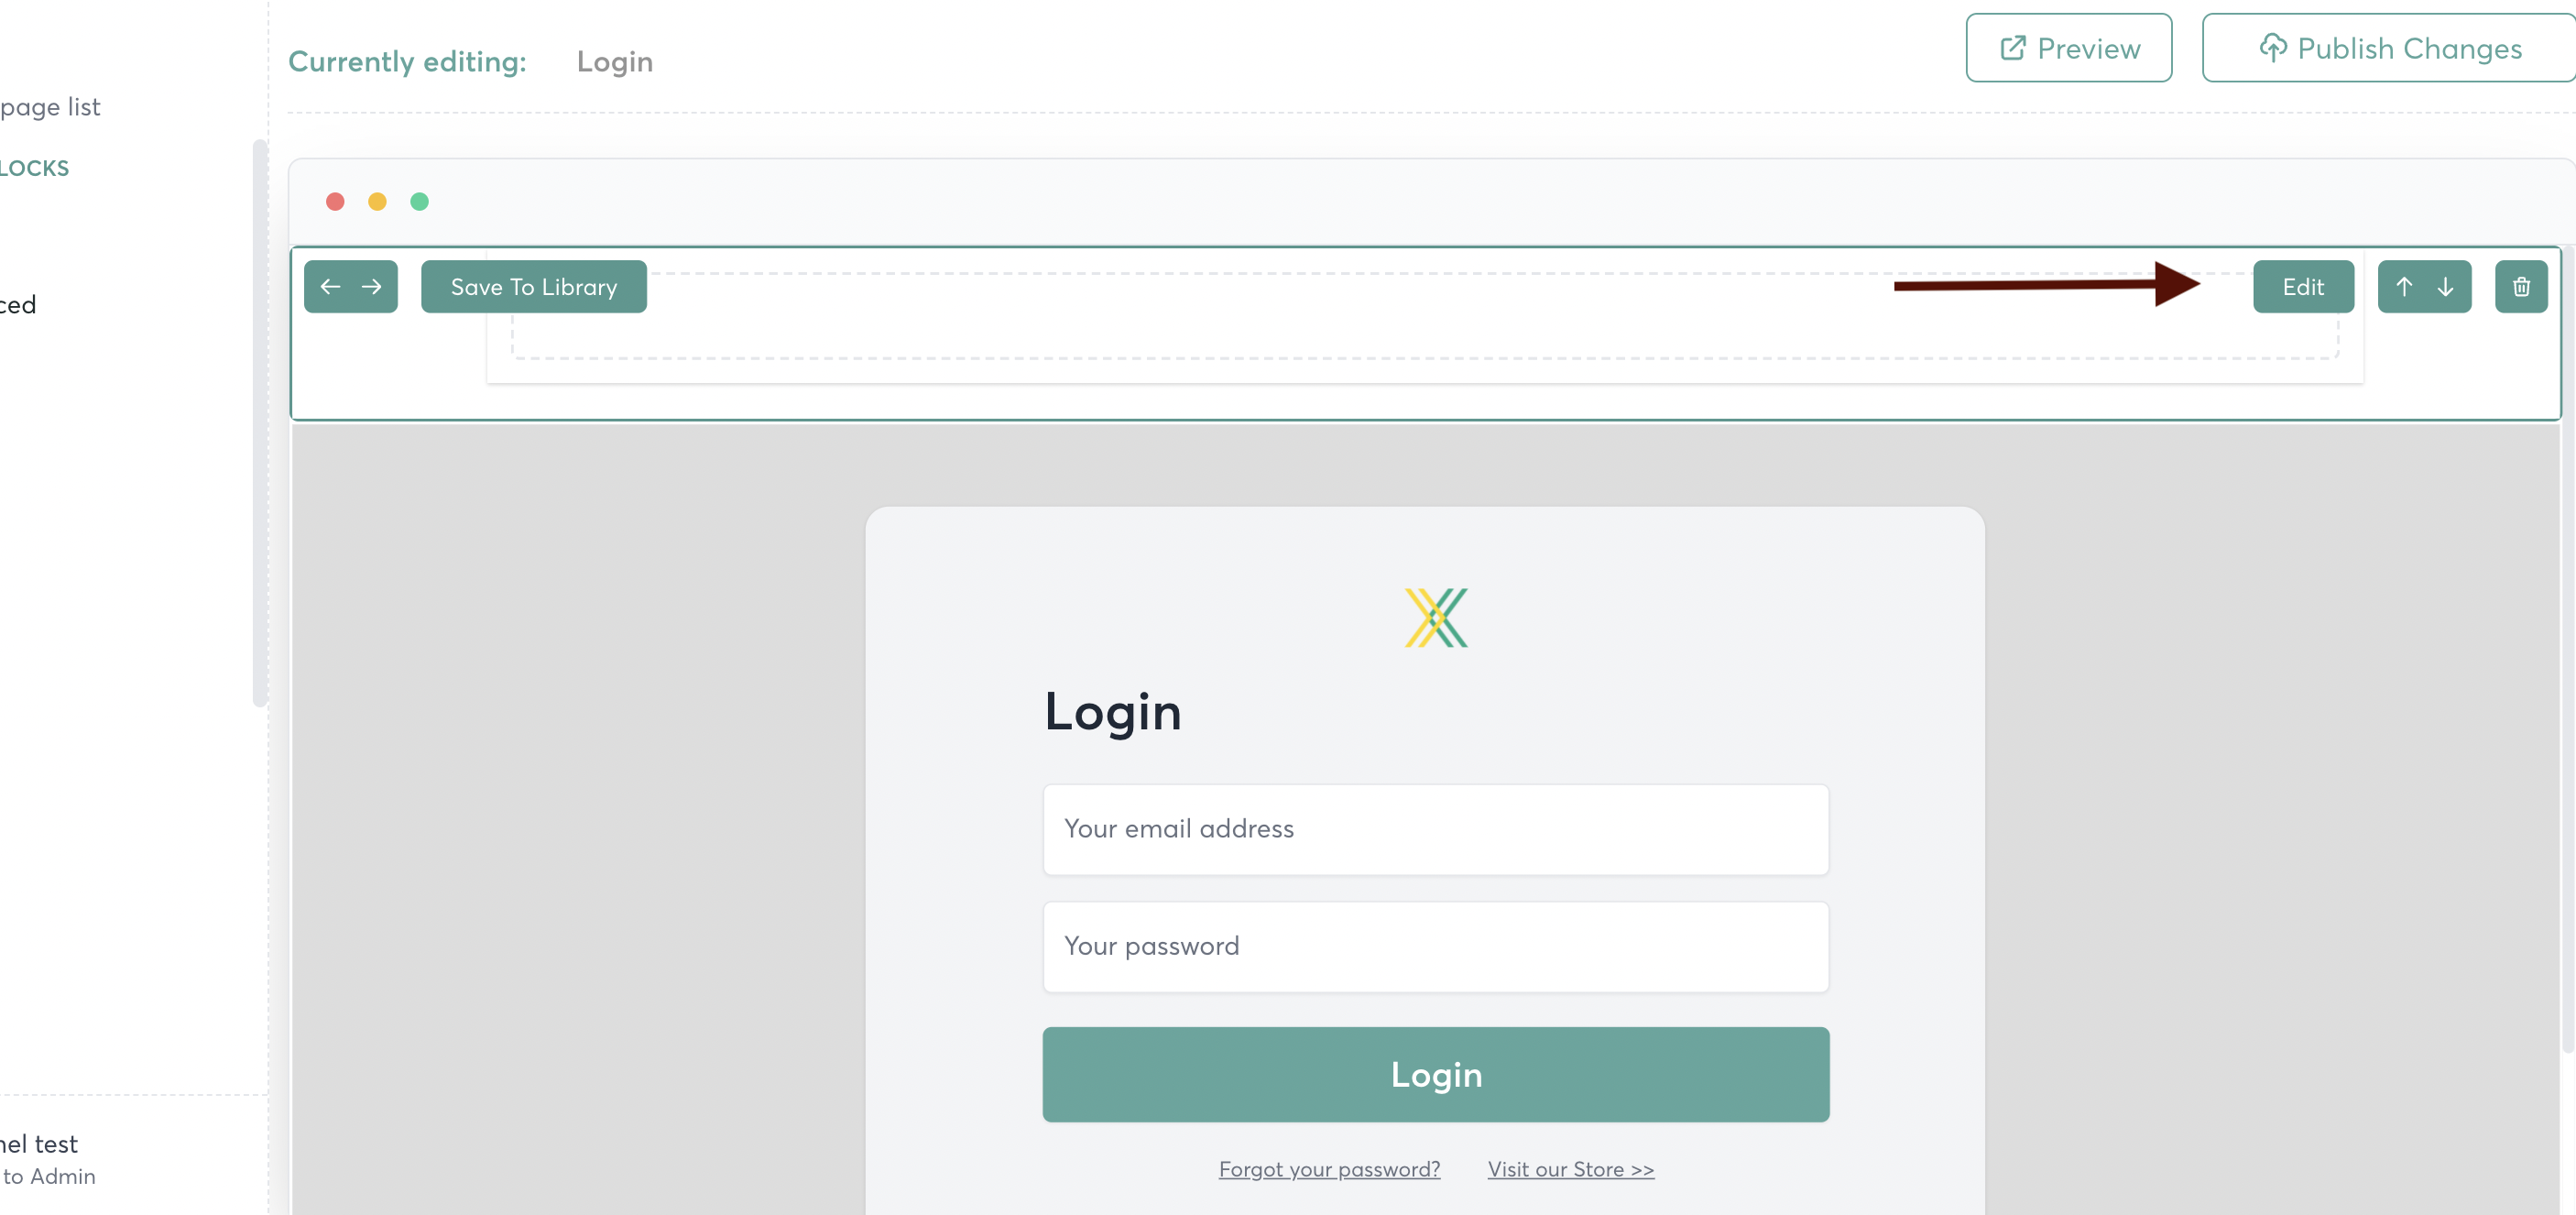
Hover over the block, and click on the "Edit" button to open it.

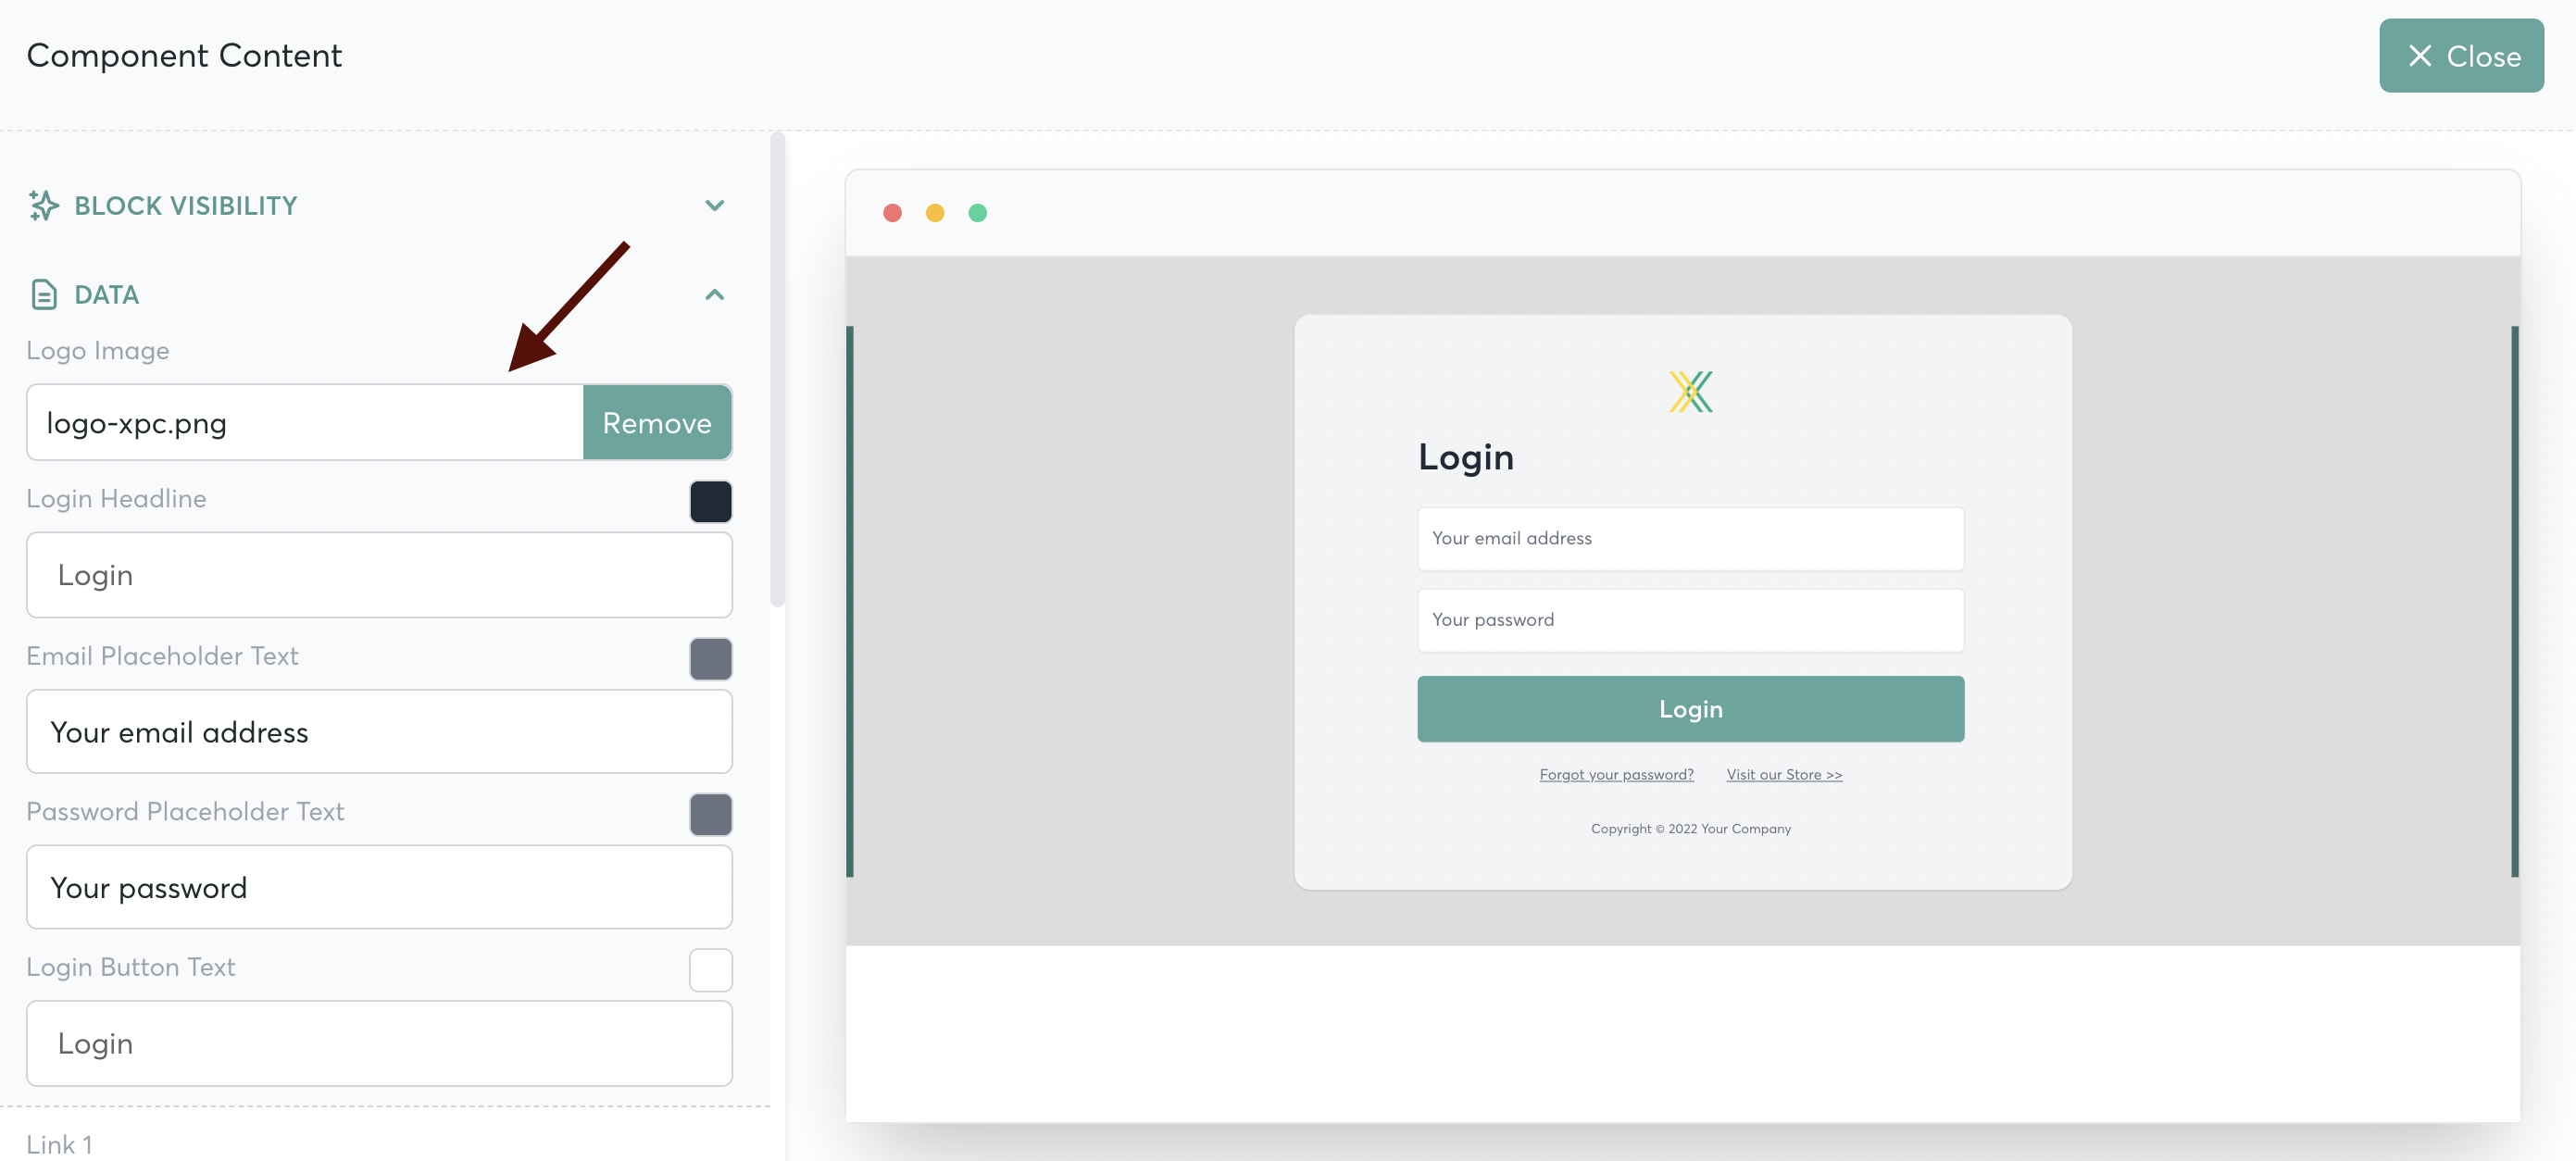
Click on the "data" dropdown menu to edit

Click here to upload your logo:
And, you can customize your colors to match your branding...
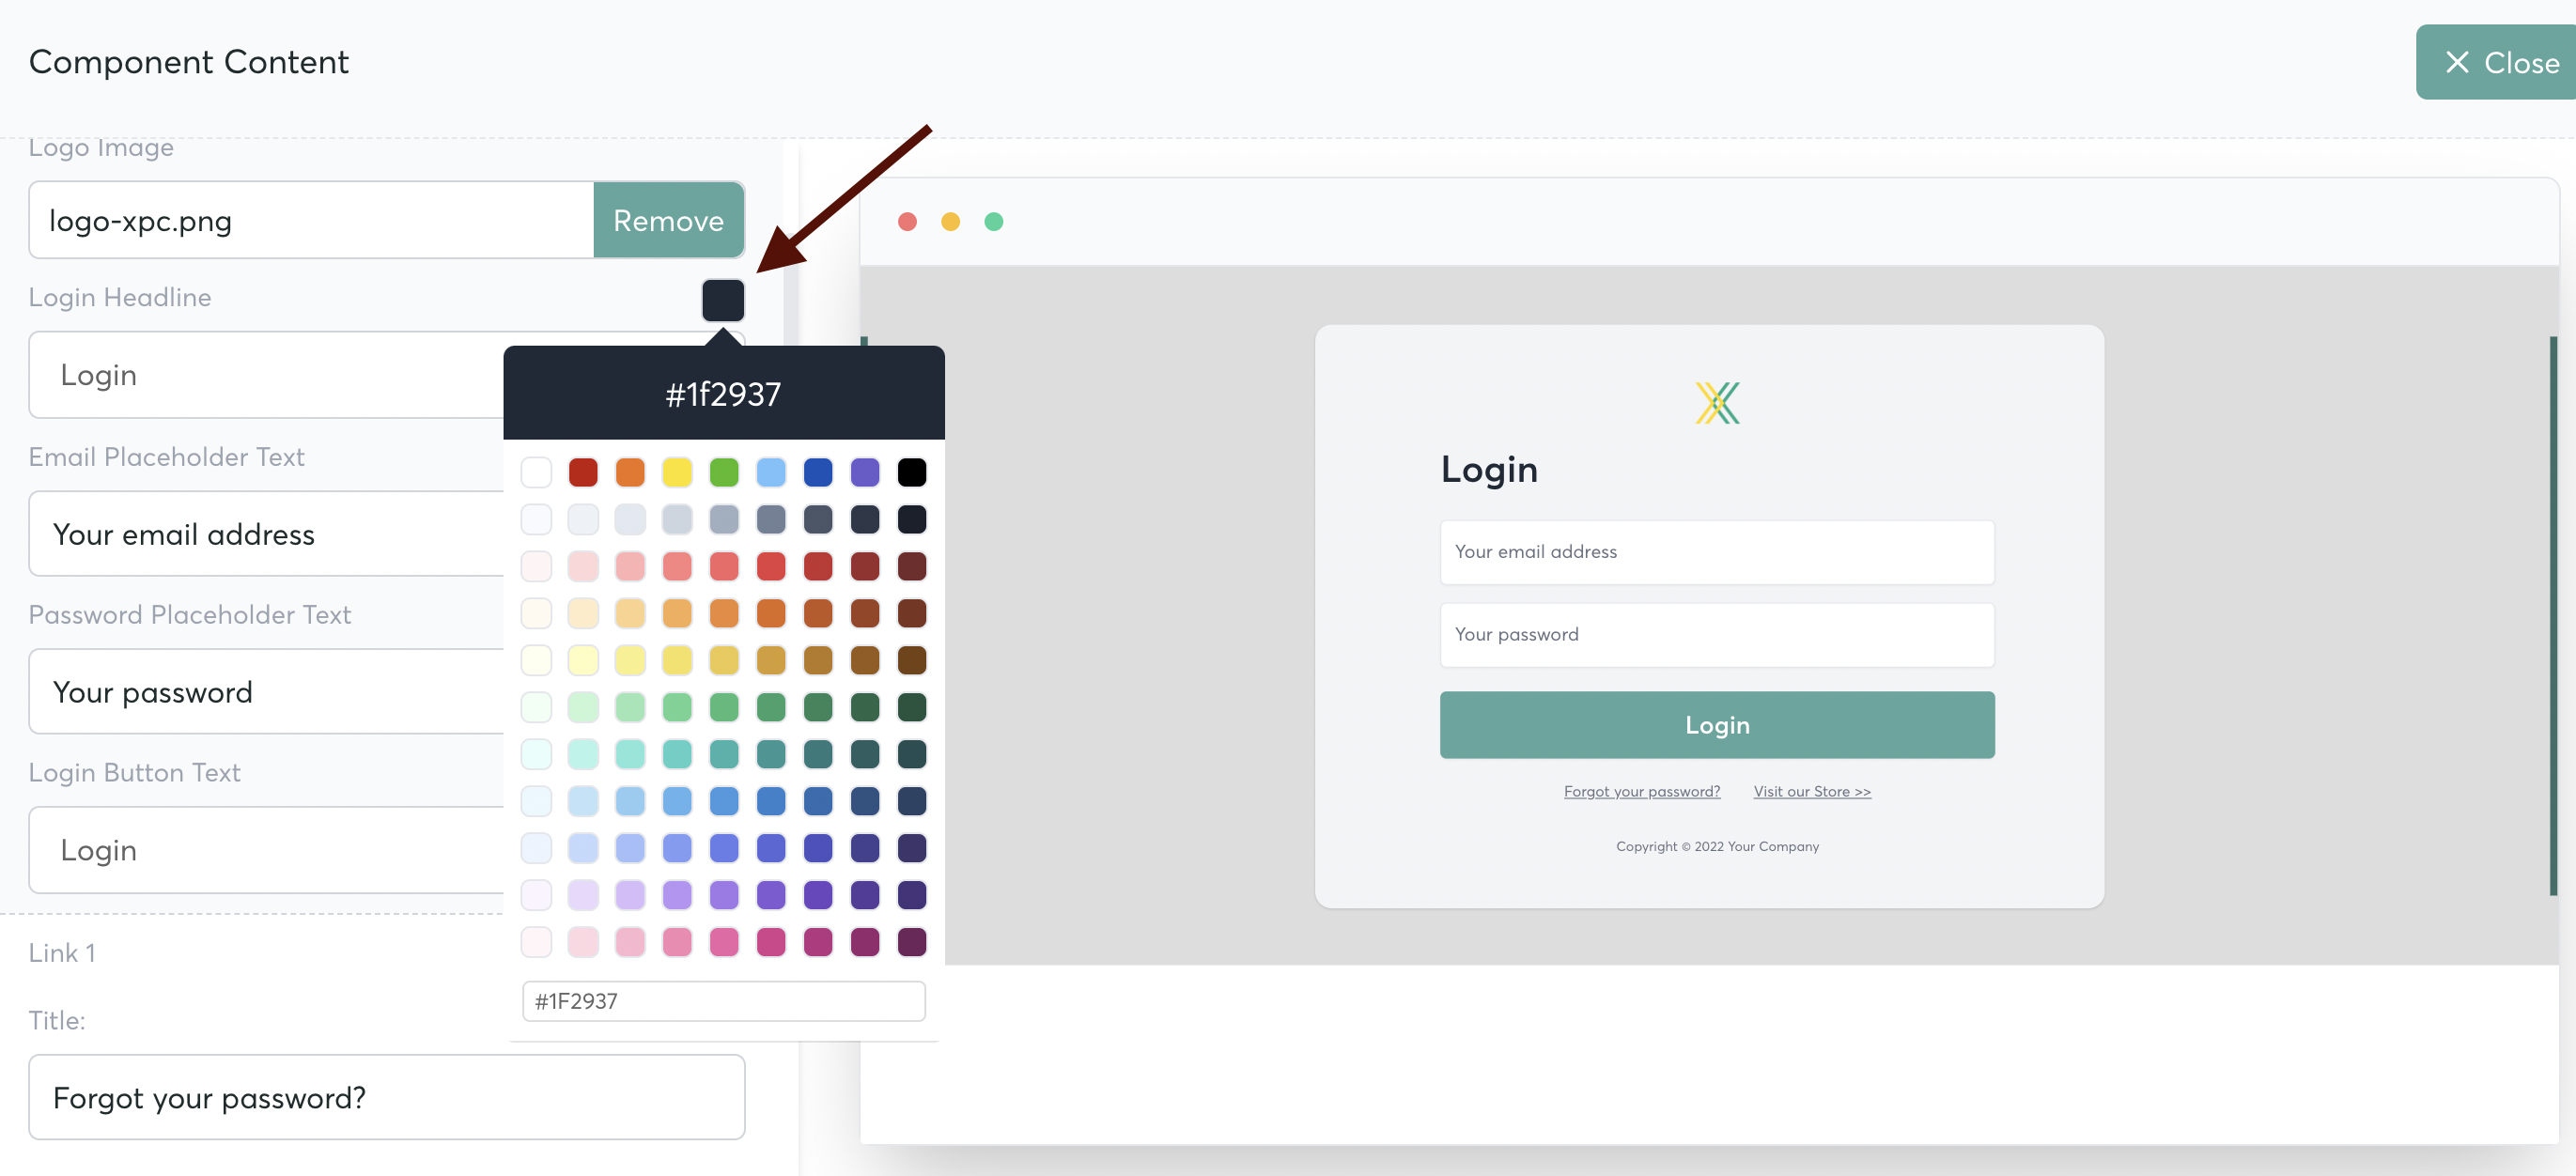
Edit your text and placeholders here (make sure to scroll down the sidebar to see all the options!)

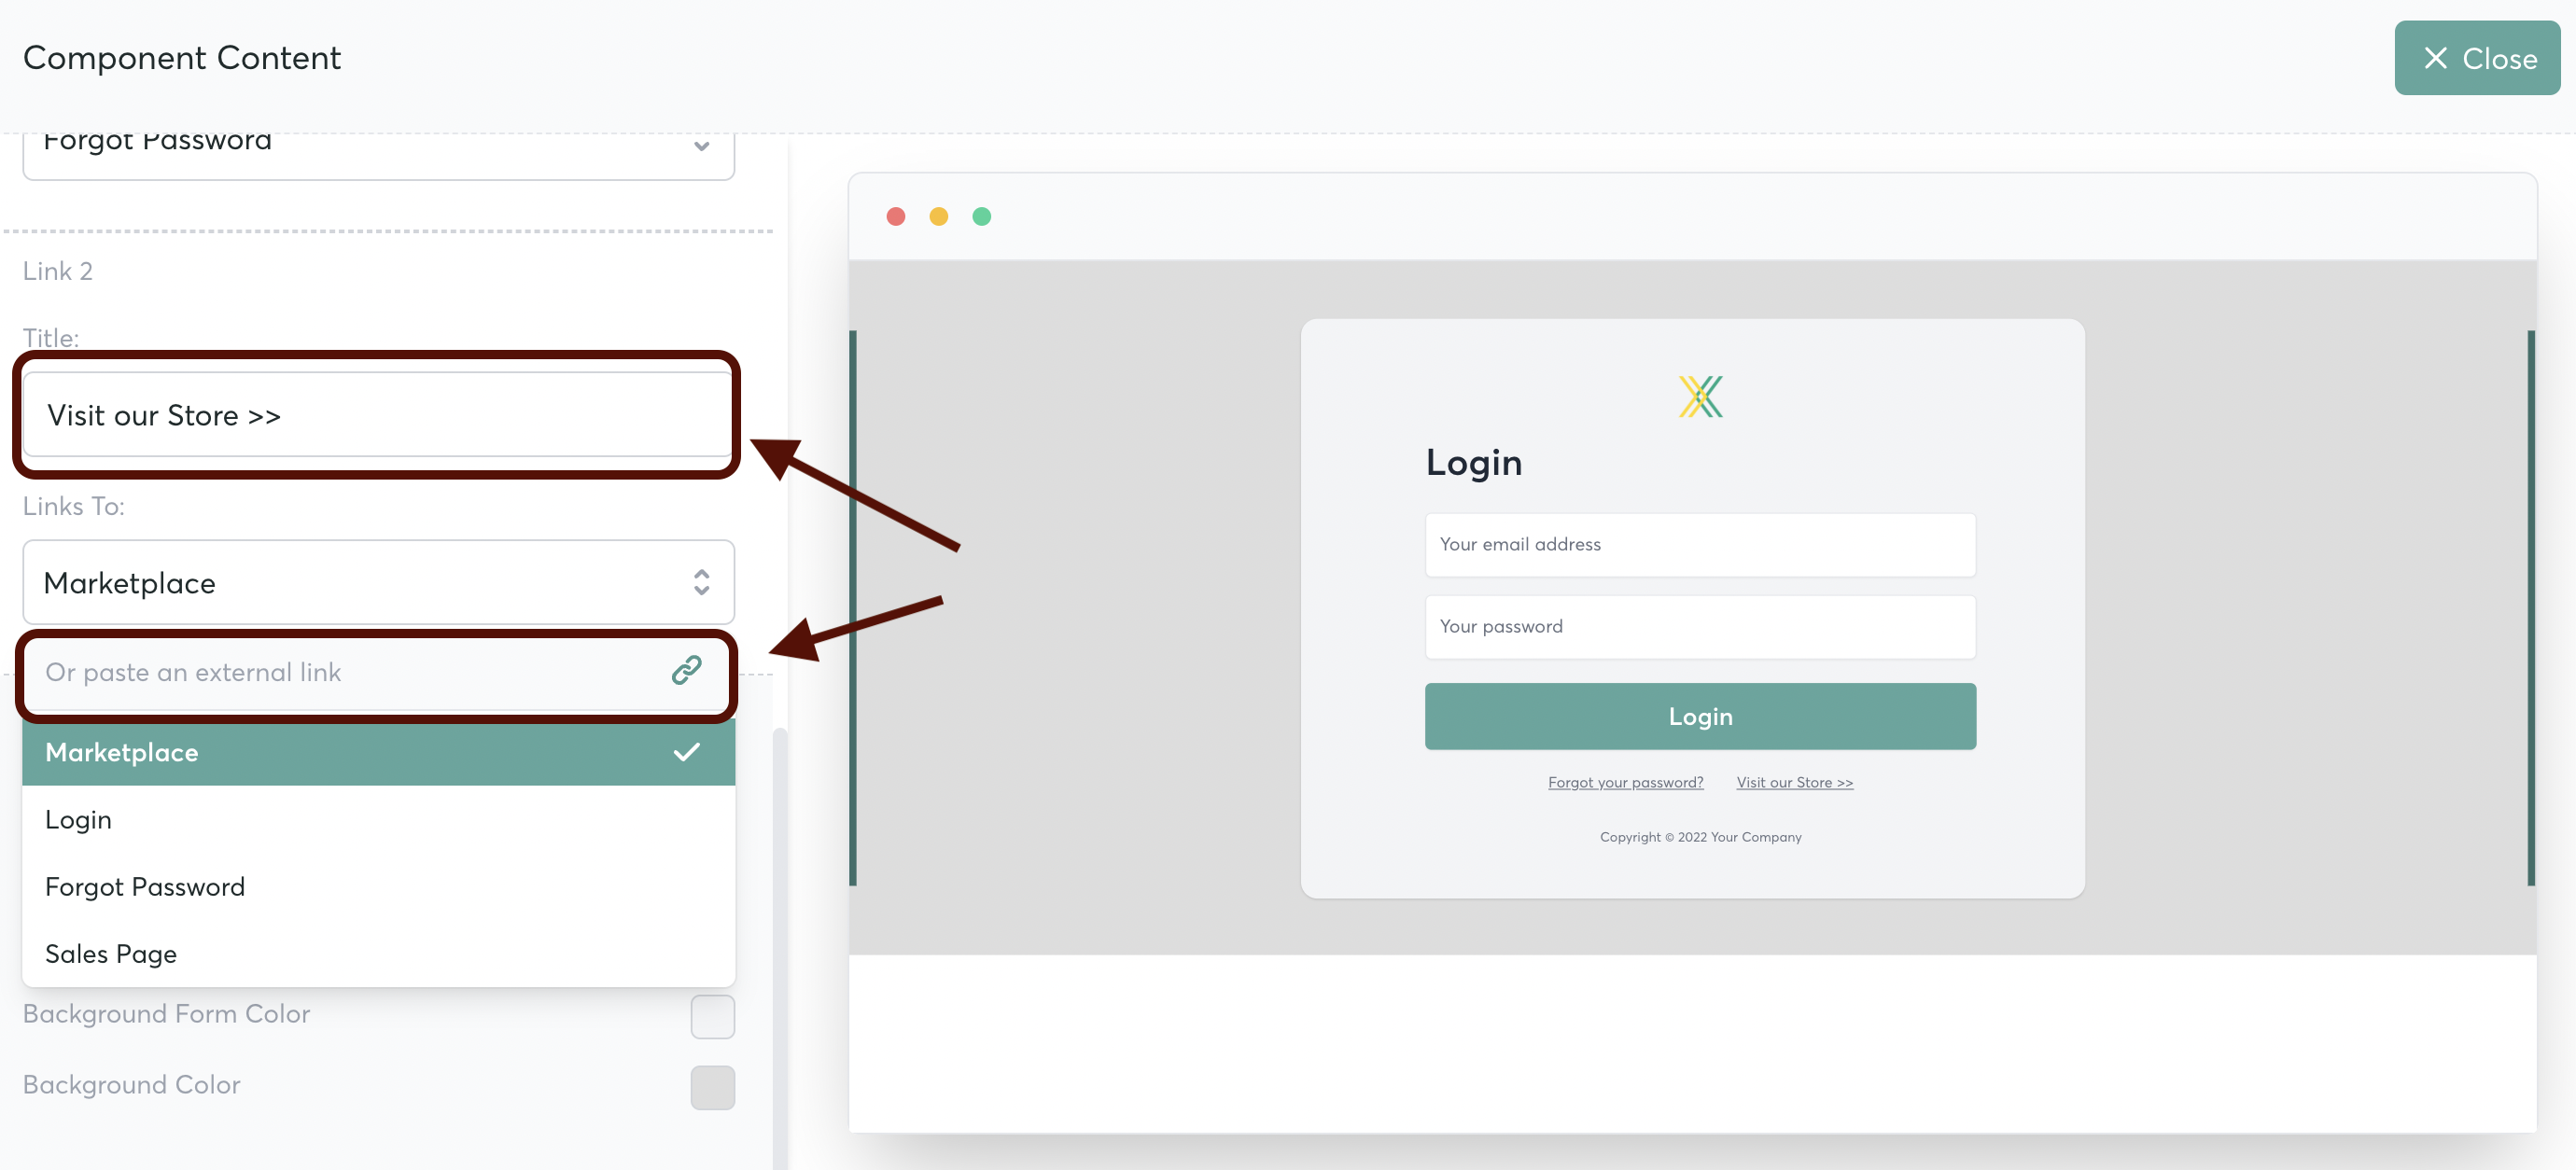
Scroll down the sidebar to edit your links for "Forgotten Password" and "Visit our Store"
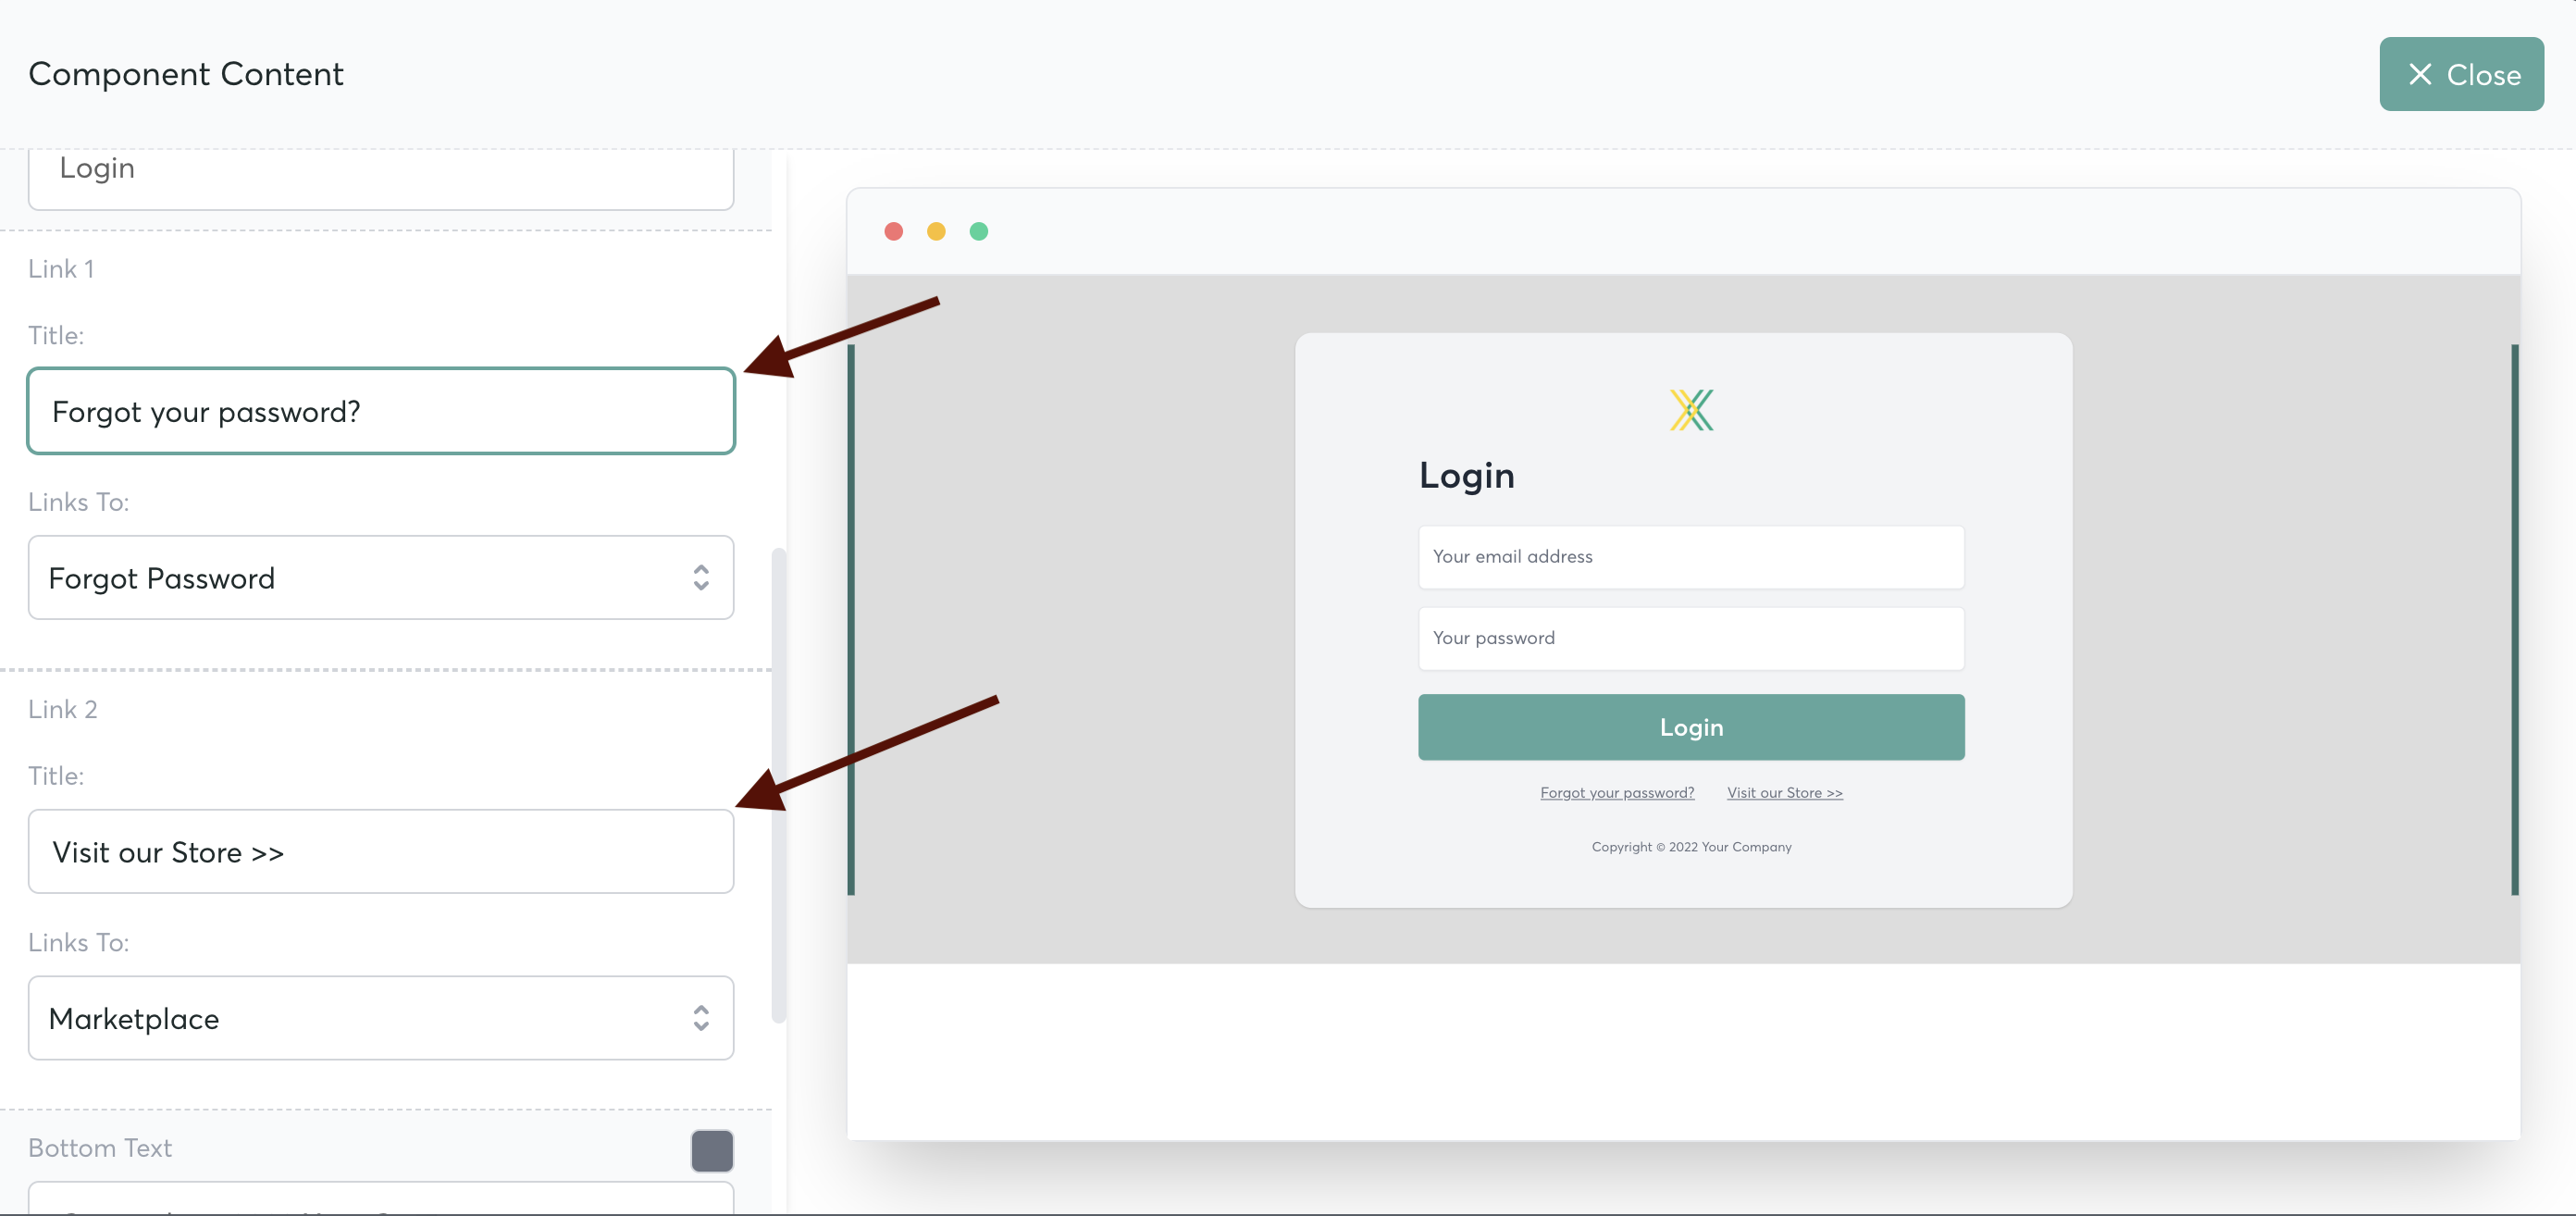
You can then select the destination links where these will go. So, for example, you can use an outside page and link your "store" to a page on your website.
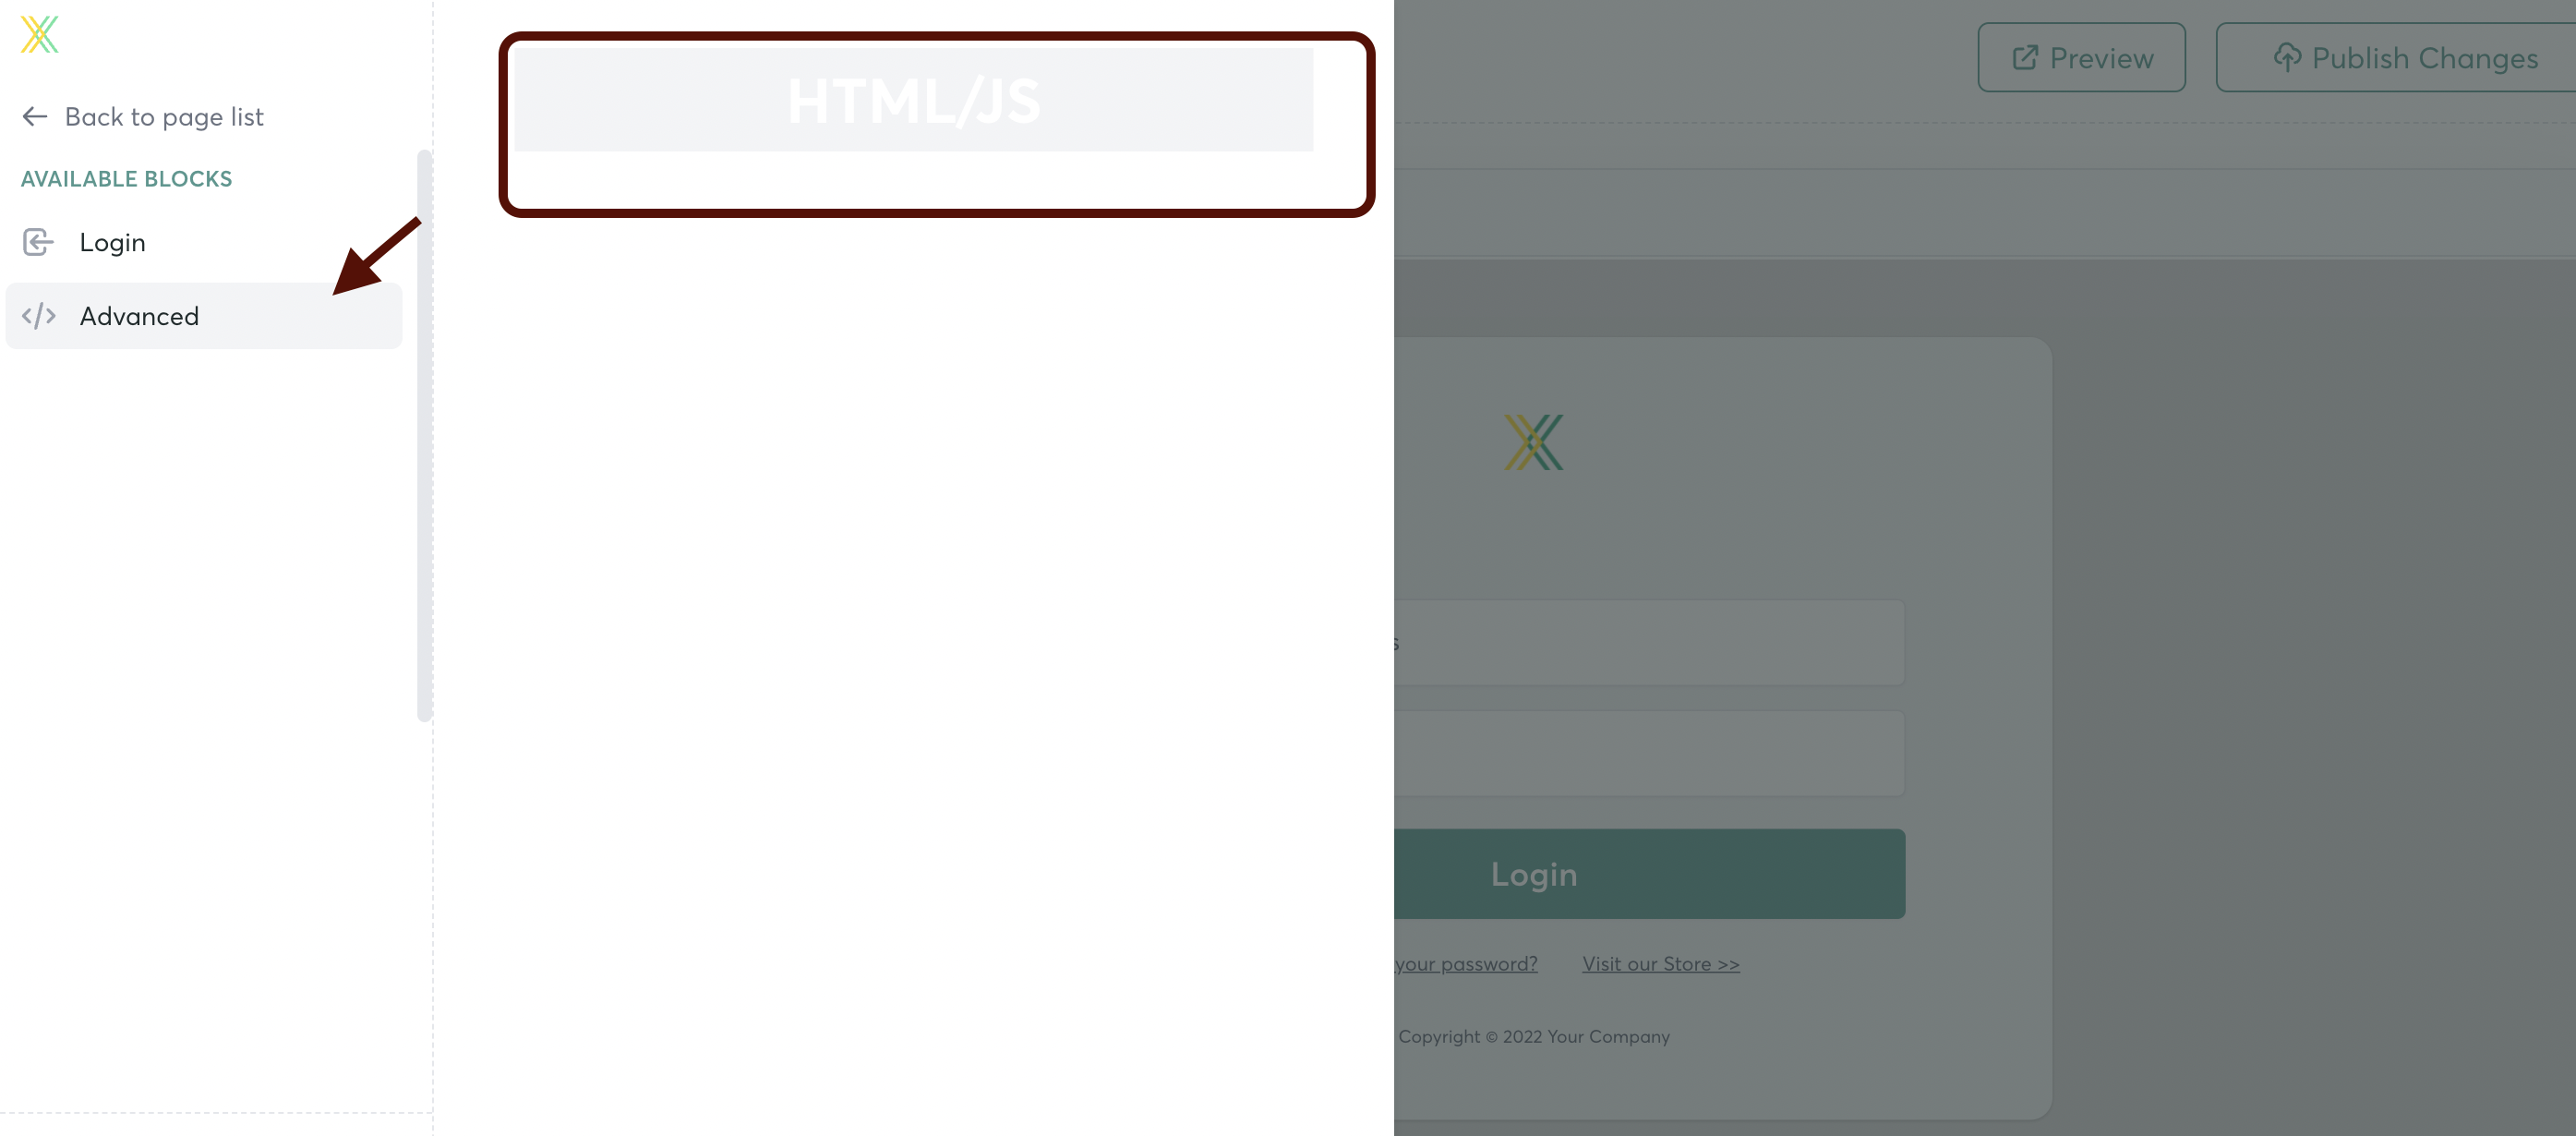
To add HTML/ JS code to your page-- go back to the left-hand sidebar, and click on the "Advanced" block. Drag it to the right to drop it onto your page.
Hover over the block, and click the button to "Edit"
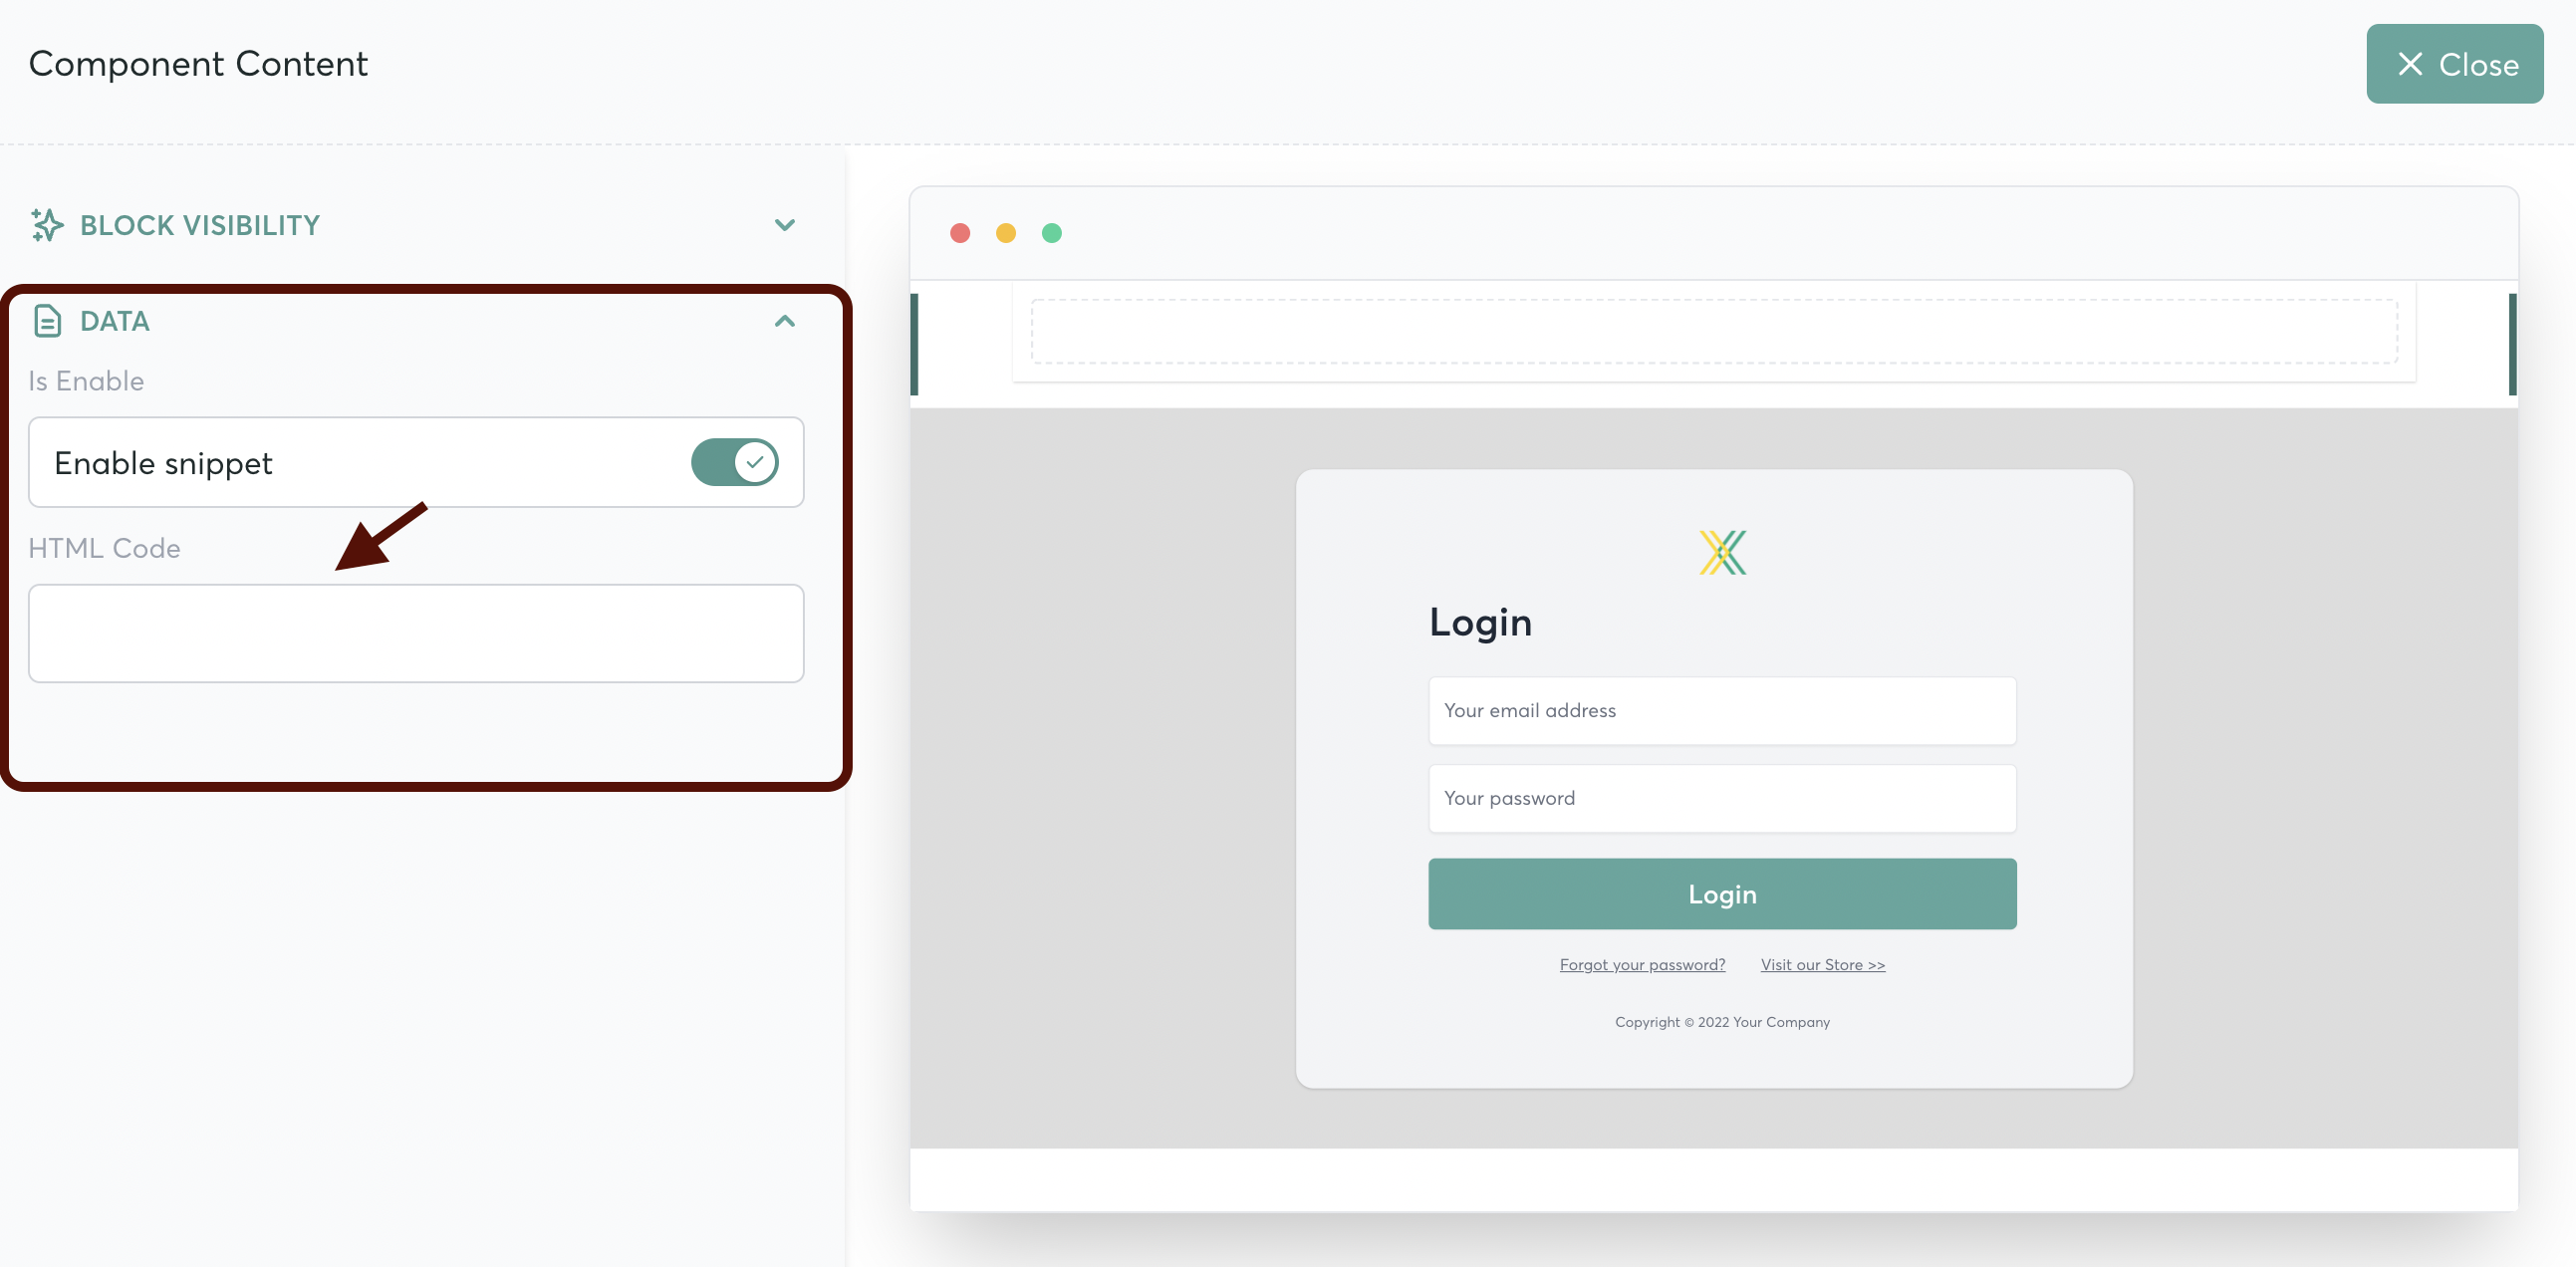
In the "Data" menu, turn the toggle on (green) to enable the code snippet
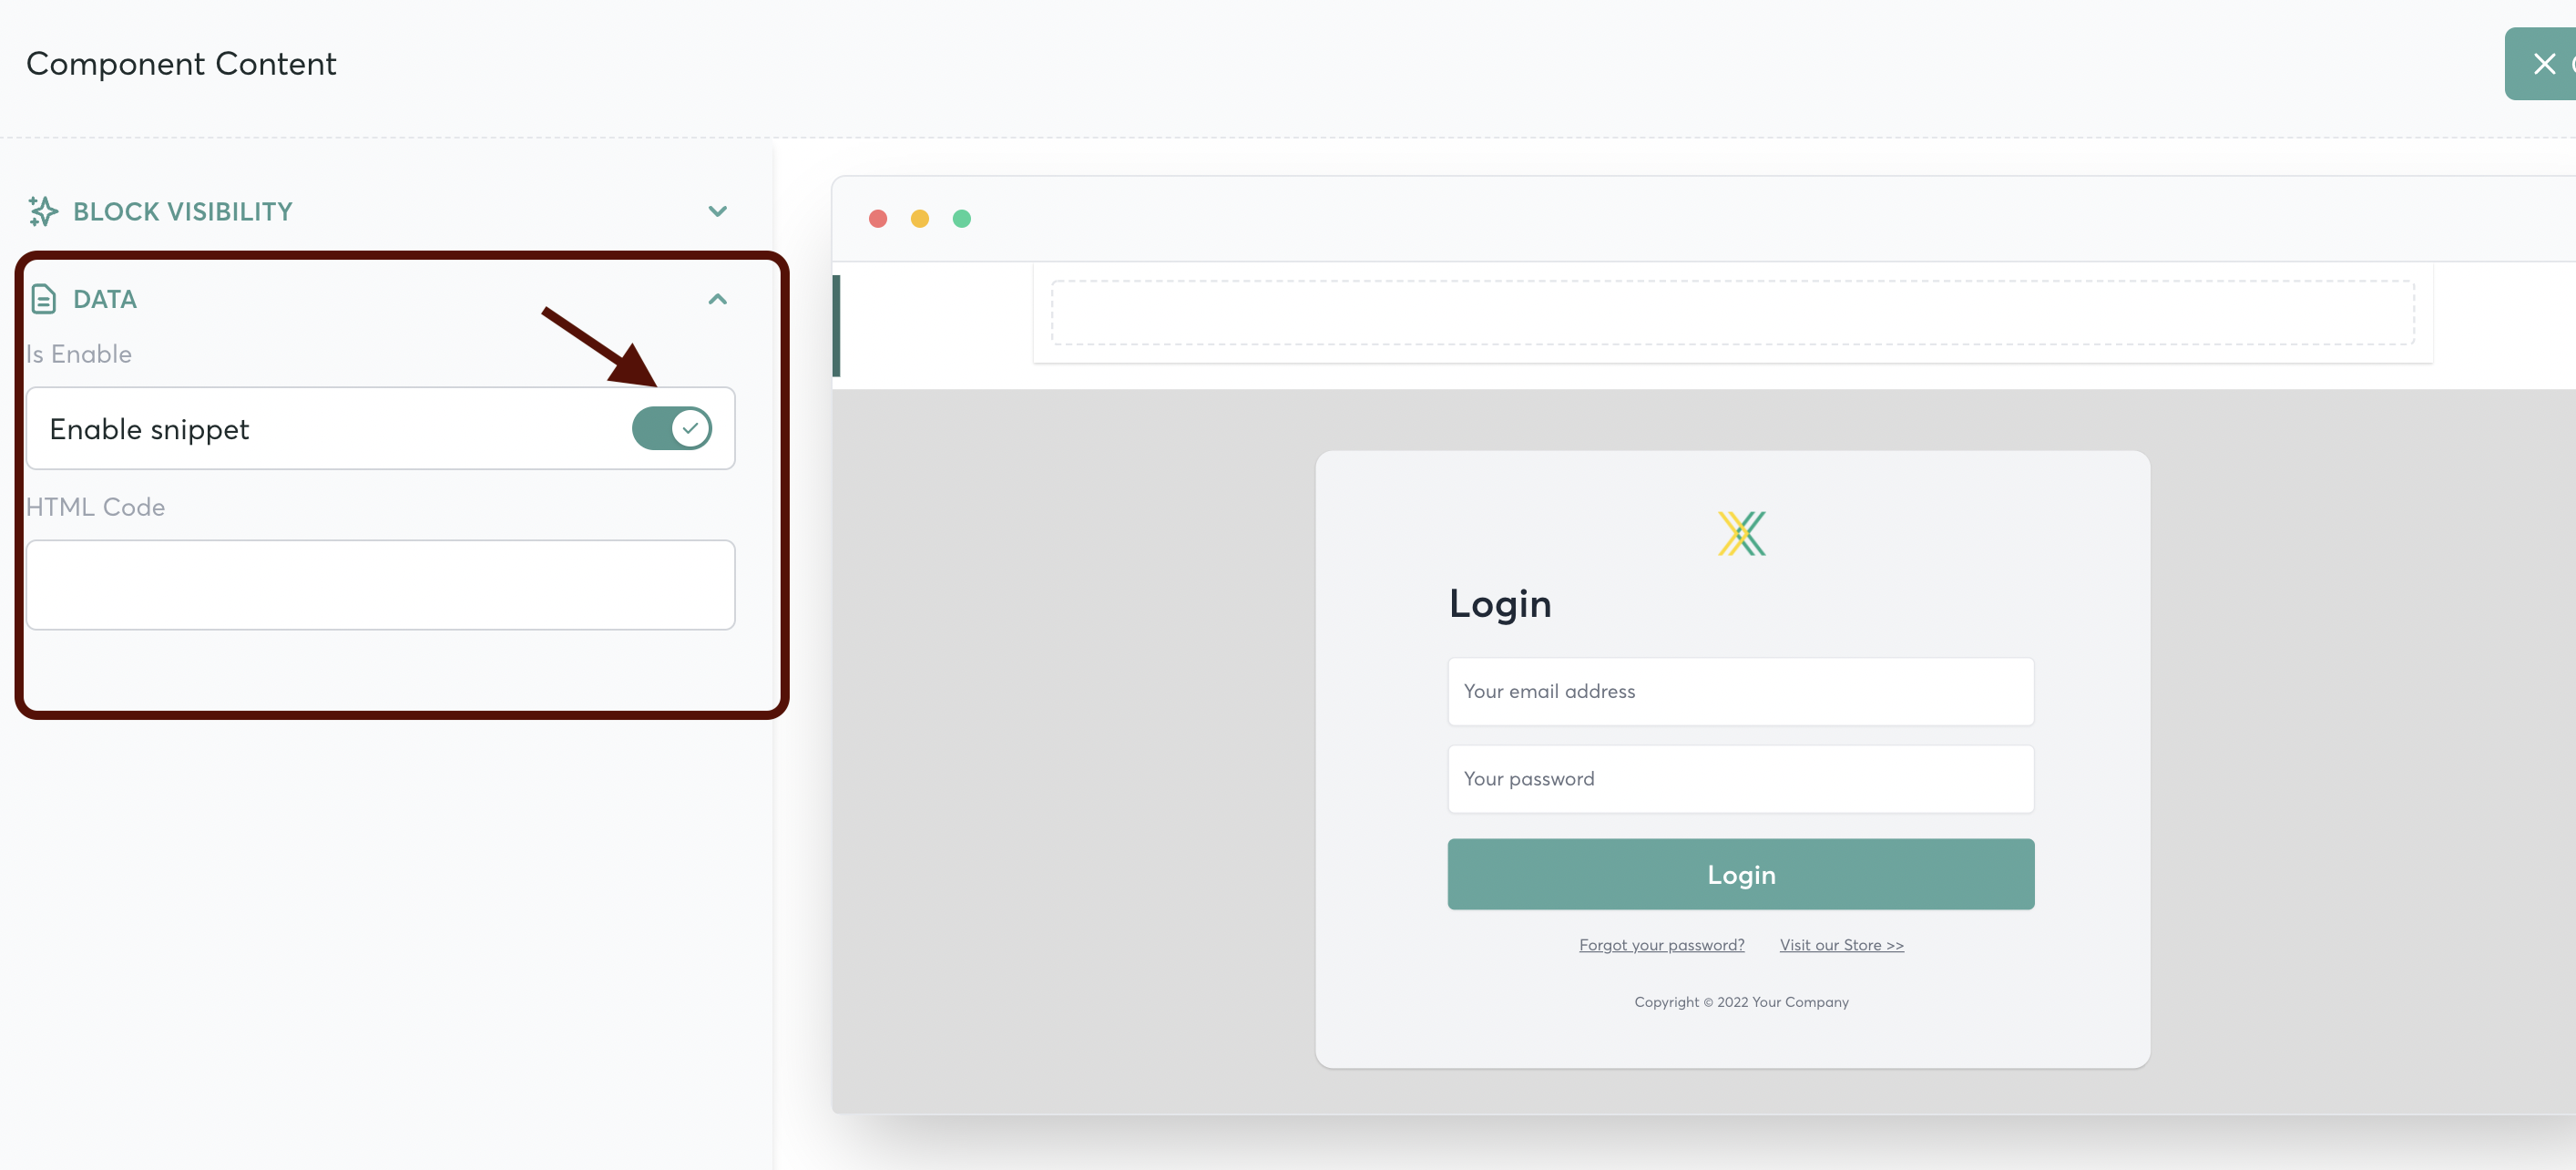
Enter your HTML or JS code in the text box.
You can customize the visbility of any block on your page. here's how to set that up